Step 3. Playing a Vinyl Record and Recording Audio Tracks with Hi-Res Audio Recorder
Play a vinyl record of your choice on the turntable and record its audio tracks with Hi-Res Audio Recorder.
- On the Record Mode window of Hi-Res Audio Recorder, click the
 (Start Recording) button.The message “Play the vinyl record on the turntable and click the "Start Recording" button.” appears.
 - Play a vinyl record on the turntable.
For detailed instructions on playing a vinyl record, refer to the Operating Instructions supplied with the turntable.
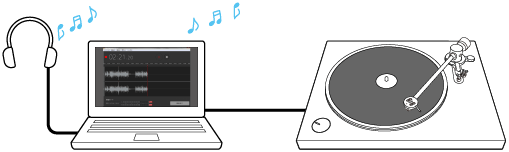
While you play a vinyl record, you hear its audio tracks from the speakers of your computer. You can adjust the playback volume on your computer.
- Before the audio track that you want to record starts playing, click [Start Recording].
The recording starts and waveforms of the audio track being recorded appear on the window.
To pause the recording, click the
 (Pause Recording) button.
To resume the recording, click the
(Start Recording) button once again. - When you are finished with the recording, click [Recording Complete].The Edit Mode window appears.
- Edit and export the temporary file.For detailed instructions on editing or exporting the temporary file, see “Adding a Marker,” “Adjusting the Signal Level for the Recorded Audio Tracks (Gain Adjustment),” and “Exporting the Temporary File Containing Recorded Audio Tracks.”
To record the B side of the vinyl record following the A side
Exporting the temporary file for the A side and then recording the B side will help you reduce the exporting duration for the B side due to a smaller size of the temporary file.
To do so, when you are finished with recording the A side, turn over the vinyl record, click [File] - [New] on the menu bar at the top of the window, and then repeat steps 1 through 5 above.
To record both A and B sides consecutively and then edit and export the temporary file
Recording both A and B sides of a vinyl record will help you simplify the editing of the temporary file because you can specify the album name and other properties at one time before exporting the temporary file.
To do so, follow steps 1 through 3 above and click the(Pause Recording) button instead of [Recording Complete] in step 4 when you are finished with recording the A side. Turn over and play the vinyl record, click the(Start Recording) button before the playback of the audio track of your choice starts, and then follow steps 4 and 5.
Note
-
When the duration available for recording is 0 minute, [Start Recording] is disabled and you need to change the temporary file storage before starting the recording. For detailed information, see “Step 2. Starting Hi-Res Audio Recorder .”
When your computer's disk drive does not have sufficient free disk space, increase the disk space, for example, by uninstalling unnecessary applications or change the partition size.
-
While you play a vinyl record, you do not hear its audio tracks unless you click the
(Start Recording) button. -
After you paused the recording, clicking the
(Start Recording) button to resume the recording does not display the message “Play the vinyl record on the turntable and click the "Start Recording" button.” The recording resumes when you click the(Start Recording) button. -
While the recording is in progress or paused, disconnecting and connecting the USB cable or turning off and on the turntable may cause the turntable to be undetectable by your computer. In such a case, restart Hi-Res Audio Recorder.
-
The audio you hear from your computer during the recording is not high-resolution audio. You hear the audio converted in the playable format by the computer from the temporary file being recorded.
-
To listen to the on-going recordings on the computer connected to the turntable, use the built-in speakers of the computer or connect a pair of headphones to the computer. If the computer has any USB audio devices, except for the turntable, connected, disconnect them all.
-
Click [OK] if the following message appears after starting Hi-Res Audio Recorder. (On Mac)

Clicking [Don’t Allow] makes recording impossible.
If this happens, click [System Preferences] on the Apple menu - [Security & Privacy] - [Privacy] - [Microphone]. Select “Hi-Res Audio Recorder” in the app list on the right to allow access to the microphone.
Hint
-
Clicking the
(Pause Recording) button to pause the recording does not stop the playback of the vinyl record. To stop the playback, stop playing the record on the turntable.For detailed information, refer to the Operating Instructions supplied with the turntable.
-
The steps 2 and 3 are interchangeable. You can start the recording on Hi-Res Audio Recorder, and then play a vinyl record on the turntable as well.
-
When you want to record a part of an audio track, it is recommended that you start the recording slightly before the beginning of the part you want to record and stop it slightly after the end of the part. Then, you can specify the unnecessary ranges on the Edit Mode window and exclude them from being exported.
For detailed information, see “Adding a Marker” and “Exporting the Temporary File Containing Recorded Audio Tracks.”