Installing/Removing the Battery Pack
To install the battery pack
-
Turn off your VAIO computer, disconnect the power cord and all connection cables, and close the LCD screen lid.
-
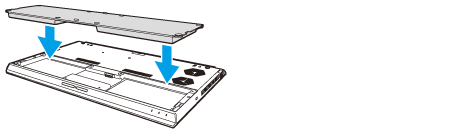
Align the battery pack with the battery compartment and fit it into the compartment.
-
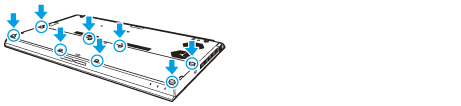
Tighten the eight screws firmly with a coin.

To remove the battery pack
-
Turn off your VAIO computer, disconnect the power cord and all connection cables, and close the LCD screen lid.
-
Unscrew the eight screws with a coin.
-
Be careful not to lose the removed screws.
-
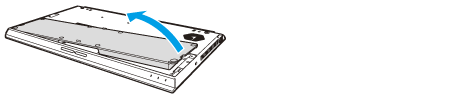
Remove the battery pack.
-
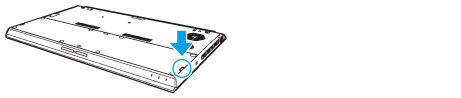
If your VAIO computer does not recognize the battery pack, push and hold the battery off button on the bottom of the computer for about three seconds with a thin, straight object (such as a paper clip). If this does not solve the problem, remove the battery pack and install it once again.
If an extended battery pack (not supplied) is attached to the computer, remove the extended battery pack. If this does not solve the problem, push and hold the battery off button for about three seconds. If the problem persists, remove the battery pack and install it once again.
-
You will lose all unsaved data if you remove the battery pack while your VAIO computer is on or in Sleep mode and not connected to the AC adapter.
Be sure to turn off the computer before removing the battery pack.