- Top Page >
- Useful Functions >
- Using TV as Picture Frame
Using TV as Picture Frame
Overview
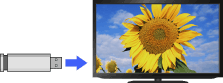
You can set a photo in the connected USB device, network device or preset picture folder to be displayed for a specified period.
Steps
Press the HOME button, then select
 [Media] at the bottom of the screen using the
  /
/ buttons.

Select [Photos] using the
 /
/ buttons, then press the
  button.
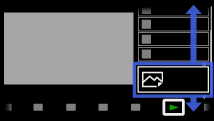
Select the USB device, server or preset picture folder containing the file to play using the
/ buttons, then press the button.Select the folder or file from the list using the
/ buttons, then press the button.
If you select a folder, select the file using the/ buttons, then press the button.
The photo is displayed.Press the OPTIONS button.
Select [File Options] using the
/ buttons, then press the button.Select [Picture Frame Image] using the
/ buttons, then press the button.Press the RETURN button repeatedly to return to the device selection list.
Select [Picture Frame] using the
/ buttons, then press the button.
To change the duration period
In the Picture Frame mode, press the OPTIONS button, select [Duration], then the desired option.
Notes
- The TV automatically switches to standby mode after a specified period.
