- Top Page >
- Watching TV >
- Watching in 3D
Watching in 3D
Overview
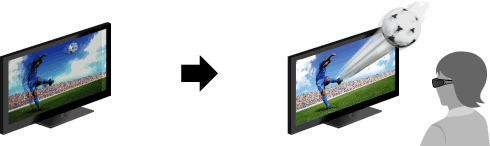
You can experience powerful 3D entertainment, such as stereoscopic 3D games and Blu-ray 3D Discs. You can also watch regular 2D content with 3D effect.
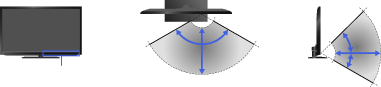
3D Sync Transmitter and 3D Glasses communication range
The preferred viewing position needs to be kept within the range where the 3D Sync Transmitter works.
Do not put anything in front of the 3D Sync Transmitter. Doing so may affect its function. Signals between the 3D Sync Transmitter and 3D Glasses may be interrupted if an infrared device is used near the TV.
Steps
Display the content to watch in 3D on the TV screen.
Turn the 3D Glasses on, then put them on.
If no 3D effect is achieved, perform the following steps.
You can use the following models of 3D Glasses: TDG-BR750, BR250, BR200, BR100, BR50. (Availability of these models may differ depending on the region/country.)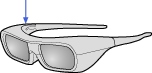 Power button3D Glasses TDG-BR250
Press the 3D button to display the [3D Display] screen.
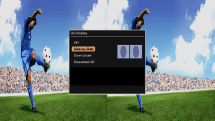
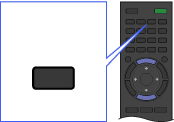 3D
3DPress the 3D button repeatedly to select the [3D Display] mode to suit the displayed content.
[Side-by-Side]: Displays side-by-side pictures in 3D.
[Over-Under]: Displays over-under pictures in 3D.
[Simulated 3D]: Displays regular 2D pictures in simulated 3D.Depending on the input signal or format, [Side-by-side]/[Over-Under] may not be selectable.
To exit the 3D Menu, press the RETURN button.
To deactivate the 3D effect
Press the 3D button repeatedly to select [Off] in [3D Display].
To adjust the 3D settings
You can adjust the following 3D settings.
Press the HOME button, select ![]() [Settings] →
[Settings] → ![]() [Display] → [3D Settings], then the desired option.
[Display] → [3D Settings], then the desired option.
- [3D Display]
- Opens [3D Display] to switch the display modes.
- [3D Depth Adjustment]
- Adjusts the depth of 3D pictures on the screen (available only for content with 3D signals). Select [Auto(High)] to always optimise to a visually comfortable depth. Select [Auto(Low)] to provide a visually comfortable depth which is close to the original picture. You can also manually set the adjustment value.
([Auto(High)]/[Auto(Low)] are available depending on the TV model.) - [Simulated 3D Effect]
- Heightens/lessens the 3D effect when you display 2D pictures in simulated 3D.
- [3D Glasses Brightness]
- Sets the image brightness when using 3D display mode. By selecting [Auto], image brightness through the 3D Glasses is automatically adjusted in conjunction with the [Picture Mode] setting.
- [Auto 3D]
- Automatically switches to 3D display mode when a 3D signal is detected. Select [Off] to prevent 3D display mode from being automatically selected when a 3D signal is detected.
Depending on the input signal or format, 3D display mode may not switch automatically.
In such a case, press the 3D button to select 3D display mode manually. - [3D Signal Notification]
- Notifies when a 3D signal is detected.
Notes
- 3D effect is available only when pictures are displayed in full screen.
- If [Motionflow] is set to other than [Off], the smooth movement of the picture may be lost as the picture process to minimise screen flicker is applied. In such a case, set [Motionflow] to [Off] to display the original picture.
- Recommended viewing angle and distance may vary depending on the TV’s location and room conditions.
- Simulated 3D effect may be less pronounced with some picture sources.
- Perceived simulated 3D effect may vary from person to person.
