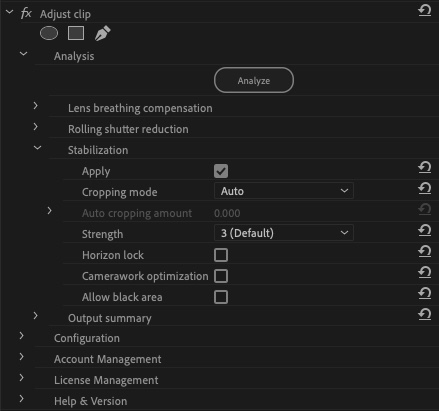
Stabilization
By using theCatalyst Prepare Pluginof the Adjust clip Plugin, you can perform stabilization on the footage by leveraging the metadata within the clips.
The Adjust clip plugin cannot be used on clips located on FTP devices, volumes of XDCAM station via CIFS, XDCAM decks, XDCAM drive units, or Optical Disc Archive volumes.
Follow these steps to use the Adobe Premiere Catalyst Prepare Plugin v2.3 stabilization.
-
Load into the project panel and drag the clip to the timeline panel.
For information on the camera settings required to enable corrections using metadata, visit https://www.sony.net/catalyst/help.
Note that if you change the camera settings or remove the lens while recording clips, stabilization may not be supported for those clips.
-
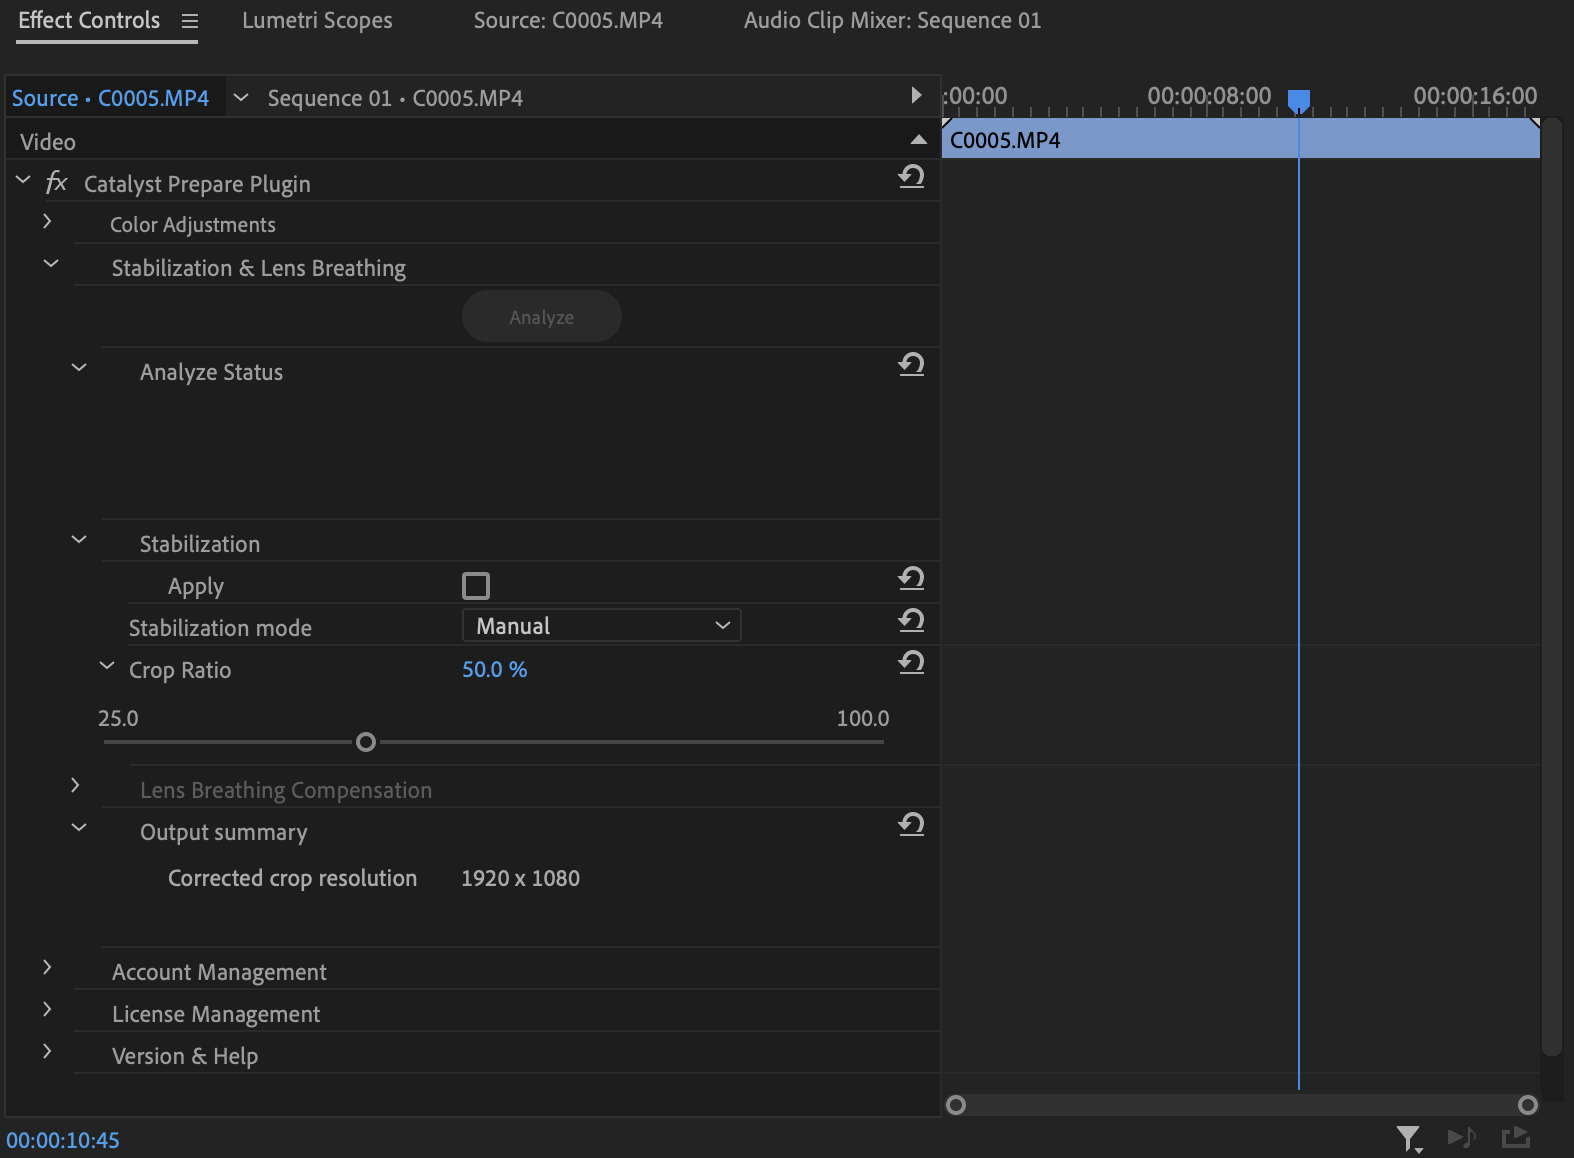
Dragging the Adjust clip from the Catalyst Prepare Plugin in the effects to the clip on the timeline will add the Adjust clip.
-
Select the Apply check box to enable stabilization.
-
[Allow black area] If you select the check box, you may be able to make the stabilization effects stronger.
You can switch the Allow black area function ON/OFF only when stabilization is on.
If you use the Allow black area function, a black border may appear around the frame.
When enabled, there is no limit to the cropping amount, and enhanced corrections are applied. Black areas may be shown.
-
You can select the [Adjust Strength] mode to change the stabilization strength.
You can select and adjust the [Strength] from 1 (weak), 2, 3 (default), 4, 5 (strong).
-
Turn ON the [Apply] check box for [Framing optimization] to enable Framing optimization.
Framing optimization is a function that suppresses the phenomenon where the amount of cropping increases and the field of view narrows due to camera movement, while maintaining correction performance and keeping a wide field of view.
In Catalyst Prepare Plugin you can suppress the camera's motion crop.
-
-
Click the Analyze button to analyze the selected clip. The results of the stabilization will be reflected in the preview display.
After analysis, the corrected resolution will be displayed in the Output summary section.
If a network connection to confirm theCatalyst Prepare Plugin license cannot be established, a watermark will appear on the correction output results.
-
Select Auto or Manual for the Stabilization mode.
-
When you select Auto the cropping amount will automatically be adjusted to minimize cropping while maximizing the effects of the stabilization.
-
-
Select the Manual button if you want to adjust stabilization settings
| Item | Description |
| Auto cropping amount | After the clip is analyzed, this indicator represents the amount of cropping that will be used to stabilize the clip. |
| Source resolution | Displays the dimensions of the source media before cropping is applied. |
| Corrected crop resolution | Displays the dimensions of the stabilized frame after cropping is applied. |
If source clips captured with Active image stabilization mode exhibit blurring when using Auto mode, choose Manual mode and decrease the Cropping amount setting.
| Item | Description |
| Cropping amount |
Drag the slider to set the amount of cropping that can be applied for stabilization. [Allow black area ] If you select the check box and set the Cropping amount to be smaller than the default, black borders may appear around frames with severe shake. We recommend using a Cropping amount setting that is close to the default value. |
| Source resolution | Displays the dimensions of the source media before cropping is applied. |
| Corrected crop resolution | Displays the dimensions of the stabilized frame after cropping is applied. |
Follow these steps if your version of Catalyst Prepare Plugin is 1.2.1 or earlier.
-
Select the clip in the Source Monitor window.
-
Select the Effect Controls window. The Catalyst Prepare Plugin controls are displayed.
-
Expand the Stabilization & Lens Breathing controls.
-
Click the Analyze button to analyze the selected clip. The results of the stabilization will be reflected in the preview display.
After analysis, the corrected resolution will be displayed in the Output summary section.