- Top Page >
- Using Other Devices >
- Digital Still Camera/Camcorder
Digital Still Camera/Camcorder
Making a Connection
Connect your Sony digital still camera or camcorder using an HDMI cable. Use a cable that has an HDMI mini jack (socket) for digital still camera/camcorder end, and a standard HDMI jack (socket) for the TV end.
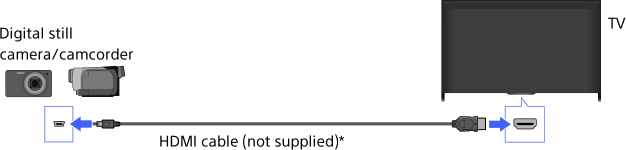
* Be sure to use an authorised HIGH SPEED HDMI cable bearing the HDMI logo.
Steps
After making a connection, turn on the connected digital still camera/camcorder.
Press the
 button repeatedly to select the connected digital still camera/camcorder.
(When using the Touchpad Remote Control, press the Control Bar (
 ), slide the touchpad to highlight the
  button, press the touchpad, slide the touchpad to highlight the connected digital still camera/camcorder, then press the touchpad.)
Start playback on the connected digital still camera/camcorder.
Tips
- If you connect a BRAVIA Sync-compatible device, you can control it by simply using the TV’s remote. Make sure that the device is BRAVIA Sync-compatible. Some devices may not be compatible with BRAVIA Sync even though they have an HDMI jack (socket).
