Turning the power on, and setting the date and time
-
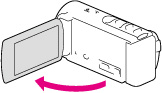
Open the LCD screen of your camcorder and turn the power on.
-
Select the desired language, then select [Next].
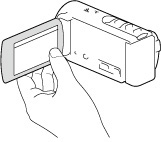
Touch the button on the LCD screen.
For HDR-CX190E, select the button using the multi-selector.
-
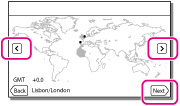
Select the desired geographical area with
 /
/ , then select [Next].
-
Set [Summer Time], select the date format and the date and time.
-
If you set [Summer Time] to [On], the clock advances 1 hour.
-
When you select the date and time, select one of the items and adjust the value with
 /
/ .
.
-
When you select
 , the date and time setting operation is complete.
A: HDR-CX200E/CX210E/PJ200E
B: HDR-CX190E

To change the language setting
You can change the on-screen displays to show messages in a specified language.
Select 
 [Setup] [
 General Settings] [Language Setting] a desired language.
[Setup] [General Settings] [Language Setting] a desired language.To turn off the power
Close the LCD screen.
To adjust the angle of the LCD screen
First open the LCD panel 90 degrees to the camcorder ( ), and then adjust the angle (
 ).
).
), and then adjust the angle ().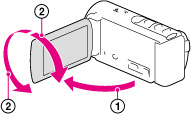
Notes
-
The recording date, time and condition are recorded automatically on the recording media. They are not displayed during recording. However, you can check them as [Data Code] during playback. To display them, select
[Setup] [ Playback Settings] [Data Code] [Date/Time].
Related topics
To set the date and time again: [Date & Time Setting]
To calibrate the touch panel: [Calibration (HDR-CX200E/CX210E/PJ200E)]