DISP (Display Contents)
-
Press
 (Display Contents) on the control wheel, then select a desired mode.
-
Selectable modes can be set using MENU

 2 [DISP Button(Monitor)] or [DISP Button(Finder)].
In shooting mode
|
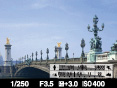
Graphic Display
|
Shows basic shooting information.
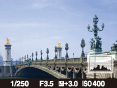
Graphically shows the shutter speed and aperture value.
 |
|
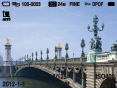
Display All Info.
|
Shows recording information.
 |
|
No Disp. Info.
|
Does not show recording information.
 |
|
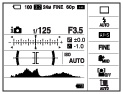
Level
|
Displays an indicator guide showing the angle of inclination of the camera to the left or right side. When the camera is held on a level, this indicator guide appears green.
 |
|
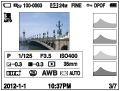
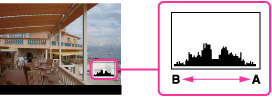
Histogram
|
Displays the luminance distribution graphically (histogram).
 |
|
For viewfinder
|
Suited for shooting with a viewfinder (sold separately).
 |
In playback mode
|
Display Info.
|
Shows recording information.
 |
|
Histogram
|
Displays the histogram and recording information.
 |
|
No Disp. Info.
|
Does not show recording information.
 |
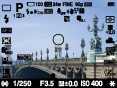
 Graphic display
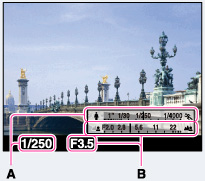
Displaying histogram
-
Press
(Display Contents) repeatedly in shooting mode to display histogram.
-
The histogram also appears when playing back a single image, but you cannot adjust the exposure.
-
The histogram does not appear when:
-
Recording/playing back movies
-
Shooting in [Sweep Panorama] mode or viewing panoramic images
-
A large difference in the histogram displayed during shooting and playback may occur when:
-
The flash strobes.
-
The shutter speed is slow or fast.
-
The histogram may not appear for images recorded using other cameras.
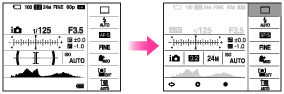
Using the Quick Navi screen
-
Select MENU
2 [DISP Button(Monitor)].
-
Check [For viewfinder], then press MENU button.
-
Press
(Display Contents) on the control wheel to set the screen mode to [For viewfinder].
-
Press the Fn button to switch to the Quick Navi screen.
 /
/ /
/ /
/ /[Sweep Panorama] mode
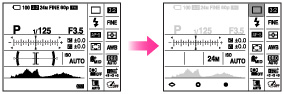
-
Select the desired item using
 /
/ /
/ /
/ on the control wheel.
-
Functions available on the Quick Navi screen
Auto Mode/Scene Selection/Image Size/Quality/Drive Mode/Flash Mode/ Smile/Face Detect. /Metering Mode/White Balance/ DRO/Auto HDR /Creative Style/Picture Effect/Auto Port. Framing/Flash Comp./ISO/Aspect Ratio/Soft Skin Effect/Autofocus Area
-
Set the item using the control wheel or the control dial.
-
Select an option using the control wheel and adjust it using the control dial.
-
Press the center of the control wheel to open the setting screen for the selected item.
-
Press the Fn button again to finish the Quick Navi.
-
You cannot change the settings of items that are grayed out.
-
When using [Creative Style], some of the setup tasks can be accomplished only on the setting screen.