Turning the power on, and setting the date and time
-
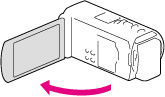
Open the LCD screen of your camcorder and turn the power on.
-
You can also turn on the camcorder by pressing POWER.
-
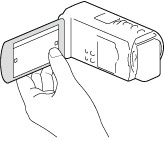
Select the desired language, then select [Next].
-
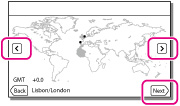
Select the desired geographical area with
 /
/ , then select [Next].
-
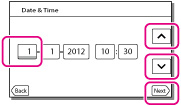
Set [Summer Time], select the date format and the date and time.
-
If you set [Summer Time] to [On], the clock advances 1 hour.
-
When you select the date and time, select one of the items and adjust the value with
 /
/ .
.
-
When you select
 , the date and time setting operation is complete.
-
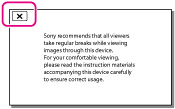
Confirm the notice on continuous use of your camcorder.
-
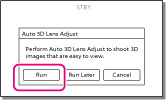
Select [Run] and display a subject on the LCD screen.
-
If you select [Run Later], the [Auto 3D Lens Adjust] screen will appear when you turn on the camcorder next time.
-
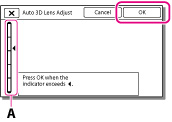
When the scale of the indicator exceeds the
 mark, select [OK].
-
The camcorder automatically zooms in or out to adjust the lenses.
-
If you feel uncomfortable viewing the image in 3D, press 2D/3D DISP and check the image in 2D.
-
If [Could not adjust.] appears, touch [Run Again].
-
If the 2D/3D switch is set to 2D, the [Auto 3D Lens Adjust] screen does not appear.
Tips on using [Auto 3D Lens Adjust]
-
Bright subjects, such as objects outdoors in daylight
-
Subjects with various colors and shapes

-
Dark subjects, such as objects viewed at night
-
Subjects within 1.5 m (4 feet 11 1/8 inches) away from the camcorder
-
Plain, non-colorful subjects
-
Subjects that repeat the same pattern, such as rows of windows on buildings
-
Moving subjects

To change the language setting

 [Setup] [
 General Settings] [Language Setting] a desired language.
To turn off the power
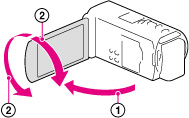
To adjust the angle of the LCD screen
 ), and then adjust the angle (
 ).
).
-
Face directly towards the LCD screen from about 30 cm (11 7/8 in.) away from the screen to watch 3D movies with optimum sense of depth.
-
The recording date, time and condition, and coordinates (HDR-TD30VE) are recorded automatically on the recording media. They are not displayed during recording. However, you can check them as [Data Code] during playback. To display them, select
[Setup] [ Playback Settings] [Data Code] [Date/Time].
-
Once the clock is set, the clock time is automatically adjusted with [Auto Clock ADJ ] and [Auto Area ADJ] set to [On]. The clock may not be adjusted to the correct time automatically, depending on the country/region selected for your camcorder. In this case, set [Auto Clock ADJ ] and [Auto Area ADJ] to [Off] (HDR-TD30VE).