Recording movies
-
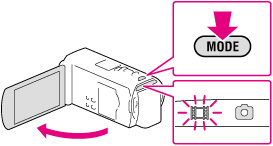
Open the LCD screen and press MODE to turn on the
 (Movie) lamp.
-
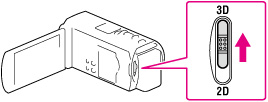
Set the 2D/3D switch to 3D.
-
To record 2D movies, set the 2D/3D switch to 2D.
-
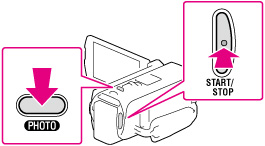
Press START/STOP to start recording.
-
To stop recording, press START/STOP again.
-
You can record photos during 2D movie recording by pressing PHOTO (Dual Capture).
-
Do not operate the 2D/3D switch during recording. The camcorder stops recording.
-
You may not be able to shoot photos depending on the setting in [
REC Mode] and [ Frame Rate].
To obtain good 3D movies
If you feel uncomfortable with 3D movies
-
When the screen is switched from 2D to 3D, the screen becomes darker. This is not a malfunction.
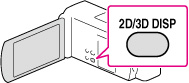
To display items on the LCD screen
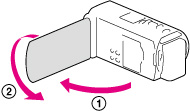
To record in mirror mode
-
Open the LCD panel 90 degrees to the camcorder (
 ), then rotate it 180 degrees to the lens side (
 ).
).
-
If you close the LCD screen while recording movies, the camcorder stops recording.
-
The maximum continuous recordable times of movies are as follows:
-
3D recording: about 6 hours 30 minutes
-
2D recording: about 13 hours
-
When a movie file exceeds 2 GB, the next movie file is created automatically.
-
The following states will be indicated if data is still being written onto the recording media after recording has finished. During this time, do not apply shock or vibration to the camcorder, or remove the battery or AC Adaptor.
-
Access lamp is lit or flashing
-
The media icon in the upper right of the LCD screen is flashing
-
The LCD screen of your camcorder can display recording images across the entire screen (full pixel display). However, this may cause slight trimming of the top, bottom, right, and left edges of images when played back on a TV which is not compatible with full pixel display. In the case of 2D recording, it is recommended you record images with [Guide Frame] set to [On] and using the outer frame of [Guide Frame] as a guide.
-
When the frame rate is set to [25p], you cannot record photos while the camcorder is in movie recording mode.