IC RecorderICD-BX140
Recording sound from the built-in microphone
The following steps are the basic recording procedures using the specified microphone sensitivity and recording mode.

Note
- Before making a recording, be sure to check the battery indicator.
- Noise may be recorded if an object, such as your finger, etc., accidentally rubs or scratches the IC recorder during recording.
Hint
- Before you start recording, we recommend you make a trial recording first, or monitor the recording.
- Slide the HOLD・POWER ON/OFF switch in the direction of “POWER ON/OFF” to turn on the IC recorder, or towards the center to release the IC recorder from the HOLD status.
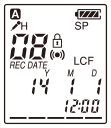
The stop mode window appears.
- Select the desired folder.
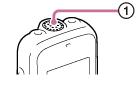
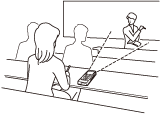
- Place the IC recorder so that the built-in microphone (
 ) faces the direction of the source to be recorded.
- Press
 REC/PAUSE in the stop mode.
The operation indicator (
 ) lights in red.
You do not need to press and hold
REC/PAUSE while recording. The new file will be automatically recorded as the last file in the current folder.
- Press
 (stop) to stop recording.
“ACCESS” appears and the IC recorder stops at the beginning of the current recording file.
(stop) to stop recording.
“ACCESS” appears and the IC recorder stops at the beginning of the current recording file.
Note
- The IC recorder is recording data and storing it on the memory when “ACCESS” appears on the display. While the IC recorder is accessing data, do not remove the batteries. Doing so may damage the data.