IC RecorderICD-UX532/UX533/UX533F/UX534F
Setting the clock
You need to set the clock to use the alarm function or record the date and time.
When you insert a battery for the first time, or when you insert a battery after the IC recorder has been without a battery for more than 1 minute, the “Set Date&Time” animation appears, and then the year section begins to flash in the clock setting display window.
- Set year, month, day, hour and minute.
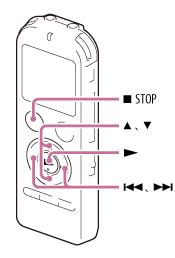
Press
 or
or  to set the year (the last two digits of the year), and then press
  .
.Repeat this procedure to set month, day, hour, and minute in sequence. You can move the cursor to the year, month, day, hour and minute by pressing
 or
or  .
.When you set the minute and press
, the clock reflects the setting.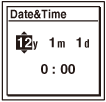
When you finish setting the clock, the display window returns to the stop mode display.
Note
- If you do not press within 1 minute of entering the clock setting data, the clock setting mode is canceled and the window will return to the display of the stop mode.
- The time is displayed either in 12-Hour with “AM” or “PM,” or in 24-Hour, depending on the “Time Display” setting in the menu. The default setting differs depending on the country or region you purchased the IC recorder.
Hint
- If you set the HOLD function to on while the IC recorder is stopped, the current time will be displayed.
- You can set the clock using the menu as well.