Connecting terminal
To close this screen and jump to the Settings screen, select the following link.
![]() Jump to the Settings screen
Jump to the Settings screen
The availability of terminals and types or shapes of connectors may vary depending on your TV.
For the label and location of the terminals, refer to the Setup Guide (printed manual).
The Setup Guide can also be downloaded from the Support Site.
| Terminal label | Description |
|---|---|
|
|
USB Connects to Digital still camera/Camcorder/USB storage media. Note
|
|
|
BUILT-IN MIC SWITCH Turns on/off the built-in MIC on the TV. (only TVs with a built-in MIC) The availability of the terminal label may vary depending on your TV. |
|
|
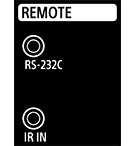
REMOTE IR IN / REMOTE Connects to the Home Controller. These jacks are for receiving the external control signal. Enables extended control of the TV using RS-232C via the RS-232C and IR IN jacks. RS-232C: Connects to the RS-232C terminal of the home controller. IR IN: Connects to the IR out terminal of the home controller. Note
|
|
|
HDMI IN Connects to the HDMI device. The HDMI interface can transfer the digital video and audio on a single cable. To enjoy high quality 4K contents, connect a Premium High Speed HDMI™ Cable(s) and follow the instructions displayed on the screen to set the [HDMI signal format] of the HDMI IN port. (HDCP 2.3-compatible) |
|
|
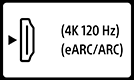
HDMI IN (4K 120 Hz) If you use an HDMI device that supports video output in 4K 100/120 Hz, connect the Ultra High Speed HDMI™ Cable, and follow the instructions displayed on the screen to set the [HDMI signal format] of the HDMI IN port. (HDCP 2.3-compatible) Note
|
|
|
HDMI IN (eARC/ARC) To connect an audio system that supports eARC (Enhanced Audio Return Channel) or ARC (Audio Return Channel), connect to the HDMI port labeled “eARC/ARC” on the TV. It is a feature that sends audio to an audio system that supports eARC/ARC through an HDMI cable. If the audio system does not support eARC/ARC, you need to connect with DIGITAL AUDIO OUT (OPTICAL). HintThere may be three tactile dots, next to the HDMI input terminal depending on your model. Use them as a guide during installation. |
|
|
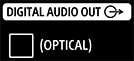
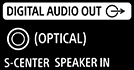
DIGITAL AUDIO OUT (OPTICAL) Connects to an audio system with optical audio input. Note
S-CENTER SPEAKER IN Connects the TV and an audio device with an S-CENTER OUT output/jack using a TV center speaker mode cable. Before connecting, make sure you unplug the AC power cord (mains lead) of the TV and audio device to be connected. NoteIf you do not use the CENTER SPEAKER IN terminal or the S-CENTER SPEAKER IN input, you will need to perform the following steps to prevent noise from the speakers.
HintThere may be two tactile dots, next to the S-CENTER SPEAKER IN terminal depending on your model. Use them as a guide during installation. |
|
|
Connects to Cable/Antenna/External Box. Note
|
|
|
LAN Connect to a Router. |
|
|
CENTER SPEAKER IN To use your TV speakers as the center speaker, connect the output of your AV receiver to the CENTER SPEAKER IN on your TV. Note
|