Preparing for Wall Mounting
-
The weight of your VAIO computer is within the range of supported weight of your mounting bracket. See the manual that came with your mounting system for the weight information.
-
While your VAIO computer is wall mounted, do not place any objects on top of the computer so as not to break the frame and cause the main unit to fall from the wall, resulting in damage to the computer or personal injuries.
-
Turn off your VAIO computer and peripheral devices, and disconnect the power cord and all connection cables.
-
Wait for a while until the computer cools down.
-
Remove the back panel of the computer.
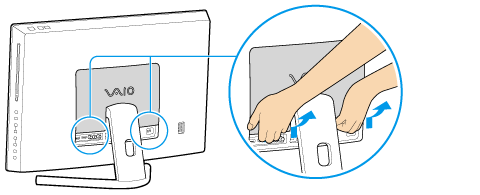
-
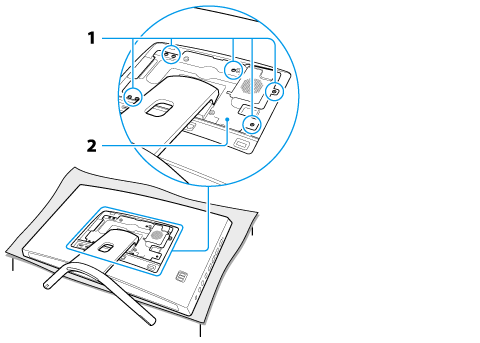
Lay a clean cloth on a level, flat surface, place the computer on it.
-
Remove the seven screws (1) with a cross slot screwdriver and take the foot stand (2) off the computer.
-
The foot stand is securely attached to your VAIO computer. While holding down the bottom part of the main unit, firmly grasp the foot stand and pull the stand out of the unit.
-
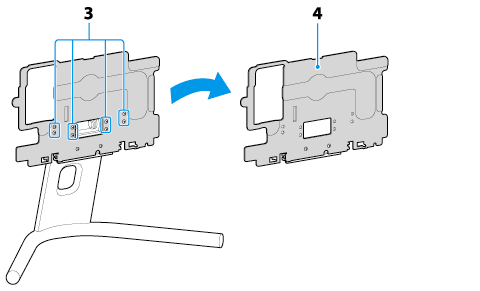
Remove the eight screws (3) from the back of the foot stand and take off the mounting base plate (4).
-
Be sure to keep the removed screws for future use.
-
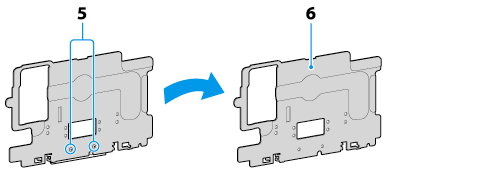
Remove the two screws (5) from the mounting base plate (6) and take off the stand wall.
-
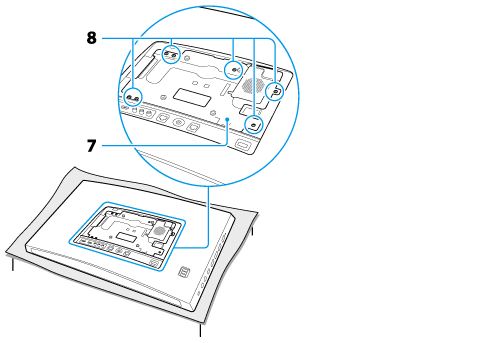
Flip over the mounting base plate (7) and screw it onto the back of the computer using the seven screws (8) attached at the same place in step 5.
-
Be sure to tighten the screws with adequate torque.
-
Secure your wall mount bracket to the computer with four M4 screws (not supplied).
-
Do not use the screws attached to your VAIO computer.
-
Follow the instructions described in the manual that came with your mounting bracket to mount the computer.
