

Installing Media Go
Install Media Go to your Windows computer.
- Connect your Walkman to your Windows computer via USB.
-
Make sure that [USB storage in use] is displayed on the screen.
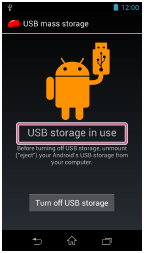
Hint
- If [USB connected] is displayed, tap [Turn on USB storage].
- Open the “WALKMAN” folder using the procedure below that corresponds to your computer.
-
Windows 7 or earlier:
Select “Start” – “Computer,” and open the “WALKMAN” folder. -
Windows 8:
Select “Desktop” from the “Start screen” to open “File Explorer.” In the “Computer” list, open the “WALKMAN” folder. -
Windows 8.1:
Select “Desktop” to open “File Explorer.” In the “This PC” list, open the “WALKMAN” folder.
-
- Double-click “FOR_WINDOWS.”
- Double-click “MediaGo_WM(.exe)” in the folder.
The setup file is extracted.
Depending on the version of Windows, a “User Account Control” screen may appear. In this case, click “Yes.”
- Follow the on-screen instructions to install Media Go.
When you click “Finish” after installation, Media Go automatically starts.
Hint
- During installation, you may be prompted to install additional software components that are necessary to run Media Go. If prompted, follow the on-screen instructions to download and install the components.
- When your Windows computer is connected to the Internet, the latest version of Media Go is automatically searched and downloaded. If a message to install the latest version of Media Go appears, click the message and follow the on-screen instructions to install the software.
- If [USB connected] is displayed on the screen, tap [Turn on USB storage] to complete the connection.
Note
- If the “WALKMAN” folder is not displayed, [SD card] is selected as the storage to be displayed on the computer. On your Walkman, select [System storage] as the storage to use.
- Depending on the environment, restarting your computer may be required. Follow the on-screen instructions.