

Setting the clock using the menu
If the linear PCM recorder is stopped, you can set the clock using the menu.
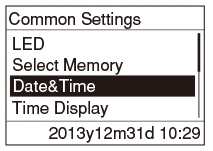
- Press and hold the HOME/BACK button for more than 1 second, select “
 Settings” - “Common Settings” - “Date&Time,” and then press the
  button.
- Press
 or
or  to select “2013y1m1d,” and then press the button.
 - Set year, month, day, hour and minute.
Press
or to set the year (the last two digits of the year), and then press  .
.Repeat this procedure to set month, day, hour, and minute in sequence. You can move the cursor to the year, month, day, hour and minute by pressing
 and .
and .When you set the minute and press the
button, “Setting completed” appears and the clock reflects the setting.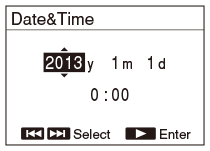
- Press and hold the HOME/BACK button to return to the HOME menu.
Note
- The time is displayed either as 12-Hour with “AM” or “PM” or as 24-hour, according to the “Time Display” setting in the menu. The default setting differs depending on the country or region where you purchased the linear PCM recorder.
- If you leave the recorder for several weeks with no batteries inserted, the date and time change to the default settings. In this case, reset the clock.