Previewing video
The video preview is displayed above the timeline and displays a project's video output at the current cursor position during editing and playback. This window is also useful when editing frame by frame for synchronizing audio.
You can also choose to display the video preview in a secondary window that you can position anywhere on your screen or on a secondary display. For more information, see "Editing Catalyst Edit options."
If you want to use the primary display and secondary window to preview files from the Media Browser, you can use the Media Browser Settings button  to display the Media Browser Settings menu. For more information, see "Finding media."
The Video Preview window temporarily enters split-screen preview mode when trimming, roll-trimming, split-trimming, or slip-trimming clips. This temporary split-screen mode allows you to see both sides of the edit at once:
-
When trimming the left edge of a clip, the left side of the preview displays the last frame from the previous clip (black if there is no previous clip), and the right side of the preview displays the first frame from the clip being trimmed.
-
When trimming the right edge of a clip, the left side of the preview displays the last frame from the clip being trimmed, and the right side of the preview displays the first frame from the next clip (black if there is no next clip).
-
When slip trimming the left or right edge of a clip, the left side of the preview displays the first frame from the clip being trimmed, and the right side of the preview displays the last frame from the clip being trimmed.
When splitting or trimming clips that contain audio, an invisible fade is applied at the edit to soften potentially harsh transitions.
Click the Preview button in the top-right corner of the video preview to choose a preview mode. Split-screen previews allow you to split the video preview and waveform/histogram/vectorscope monitor so you can see your affected and unaffected video at the same time.
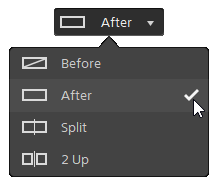
 Before: full-frame video is displayed in its original state.
 After: full-frame video is displayed in its color-corrected state.
 Split: a single frame is displayed in a split-screen view with the original video on the left and the color-corrected video on the right.
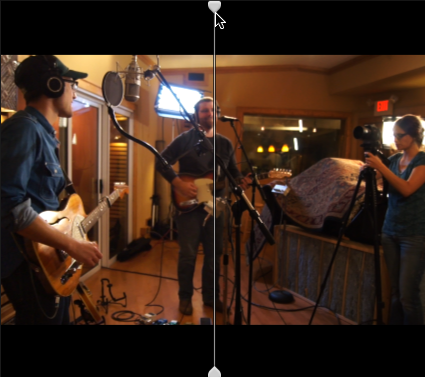
If you want to move the split location, hover over the preview frame. When the split point is displayed, you can drag the handles at the top of bottom of the screen to adjust where the preview is split:
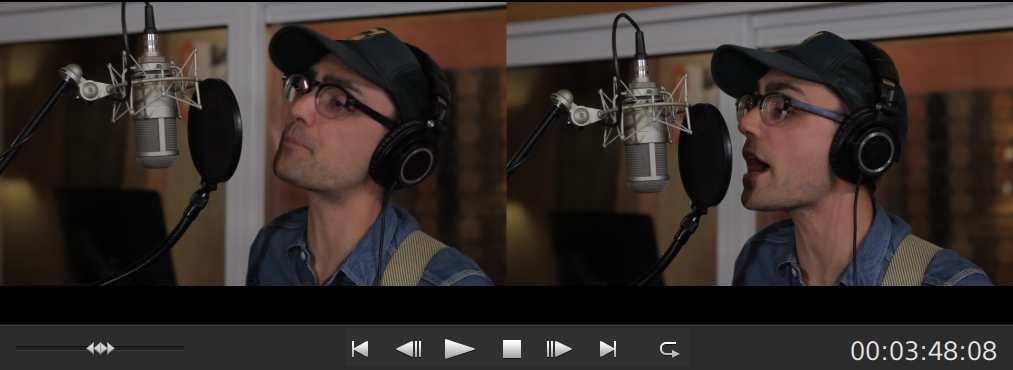
 2 Up: two full frames are displayed in a split-screen view with the original video on the left and the color-corrected video on the right.
Scaling the video preview
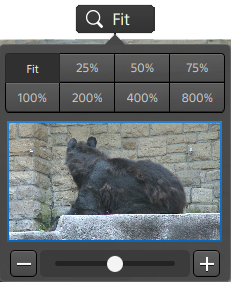
Click the magnifying glass to adjust the size of the video preview.
-
Click Fit to scale the video to fill the Video pane.
-
Click a preset to scale the video to a predefined magnification level.
When the level is below 100%, you can drag the blue rectangle to pan and adjust the visible portion of the frame.
-
Drag the slider or click the
 and
and  buttons to choose a custom zoom level.
 -
Click the thumbnail and roll your mouse wheel to zoom in or out.
Using the transport controls
The transport controls below the video preview allow you to control playback:
| Button | Description | |
|---|---|---|
|
|
Moves the playback position indicator to the beginning of the timeline. |
|
|
|
Moves the playback position indicator one frame or field to the left. |
|
|
|
Playback will start from the playback position indicator and continue until the the end of the file. |
|
|
|
Stops playback or recording and returns the cursor to its starting position. |
|
|
|
Moves the playback position indicator one frame or field to the right. |
|
|
|
Moves the playback position indicator to the end of the timeline. |
|
|
|
Plays only the area between the Mark In and Mark Out points in a continuous mode. For more information, see "Marking in and out points for playback." |
|


Using split-screen previews
You can use split-screen previews to preview your project with and without video effects. For more information, see "Using video effects."
Click the Split-Screen Preview button in the top-right corner of the video preview to choose a preview mode. Split-screen previews allow you to split the video preview and waveform/histogram/vectorscope monitor so you can see your original and effected video at the same time.
-
Before: full-frame video is displayed in its original state.
-
Split: a single frame is displayed in a split-screen view with the original video on the left and the effected video on the right.
If you want to move the split location, hover over the preview frame. When the split point is displayed, you can drag the handles at the top of bottom of the screen to adjust where the preview is split:
-
2 Up: two full frames are displayed in a split-screen view with the original video on the left and the effected video on the right.
Displaying overlays for safe areas and anamorphic masking
-
Click the
button to display the Video Settings menu. -
Select the Show safe areas switch to enable safe area guides and a center point in the video preview.
When Show safe areas is enabled, Catalyst Edit displays rectangles marking 90% (action safe area) and 80% (title safe area) of the frame to serve as guidelines for framing.
-
Select the Mask to 2.39:1 switch to enable shading in the video preview to indicate how an anamorphic version of your content will appear.
Displaying waveform, histogram, and vectorscope monitors
The video preview includes a waveform monitor and histogram that you can use to monitor color values.
-
Click the
button to display the Video Settings menu. -
Turn on the Waveform, Histogram, or Vectorscope switch to enable the monitor.
Waveform
The waveform monitor displays the luminance values (brightness or Y component) of your video signal. The monitor plots luminance values on the vertical axis and the width of the current frame on the horizontal axis.
You can use the buttons at the top of the waveform monitor to display overlaid (
 ) or separate (
 ) RGB waveforms and isolate colors
  .
.Histogram
The histogram monitor displays the number of pixels that exist for each color intensity. The vertical axis represents the number of pixels, and the horizontal axis represents the RGB color range from 0 to 255.
You can use the buttons at the top of the histogram monitor to display overlaid (
) or separate () RGB histograms and isolate colors  .
.Vectorscope
The vectorscope monitor allows you to monitor the chroma values (color content) of your video signal. The monitor plots hue and saturation on a color wheel.
The vectorscope displays targets for broadcast-legal saturations of red (R), magenta (Mg), blue (B), cyan (Cy), green (G), and yellow (Yl). Individual colors in your video signal are displayed as dots in the vectorscope. A dot's distance from the center of the scope represents its saturation, and the angle of the line from the dot to the center of the scope represents its hue.
For example, if an image has a blue cast, the distribution of dots in the vectorscope will be concentrated toward the blue portion of the color wheel. If the image includes out-of-range blue values, the vectorscope display will extend beyond the blue target.
You can use the vectorscope to calibrate color between scenes. Without calibration, you may see noticeable color differences between scenes from multicamera shoots.
Click the Settings button
to open the Vectorscope Settings menu.The Vectorscope Settings menu allows you to toggle a monochrome view of the scope, change the scale of the scope, adjust the brightness of the colors displayed in the scope, and adjust the brightness of the scope's guide (graticule).
Use the 75% Scale setting when your source media uses 75% color bars, or use the 100% setting your source media uses 100% color bars.
Editing video effect parameters in the video preview
When you're editing video effects, a control point ( ) is displayed in the video preview when you select a position parameter in the Inspector.
You can adjust the parameter's position by dragging the control point in the video preview or the Inspector: 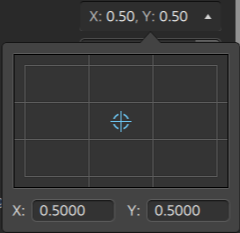
When a plug-in includes support for interactive overlay controls in the video preview, you can click the Overlay button  in the Inspector to show or hide the overlay.
For more information, see "Using video effects."