


Front Speaker
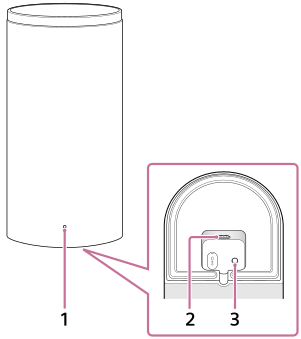
Front, Bottom
-
Power indicator
Indicates the front speaker status by lighting or flashing in 3 colors (white/blue/red).
-
AC inlet
-
LINK
The function of the button varies depending on how long it is pressed.
When the front speaker is turned on:
- Press: Press this button when the center speaker and front speakers do not connect properly with the “Sony | BRAVIA Connect” app. Follow the instructions on the app.
- Press and hold for 2 seconds until the notification sound plays: Turns off the front speaker.
- Press and hold for more than 10 seconds until the second notification sound plays: Resets the front speaker.
When the front speaker is turned off:
- Press: Turns on the front speaker.
Hint
- The indented area on the bottom of the left front speaker (FRONT L) has a convex bar approximately 5 mm (13/64 in) in size and two tactile dots approximately 1 mm (1/16 in) in size lined up side by side.
The indented area on the bottom of the right front speaker (FRONT R) has a convex bar approximately 5 mm (13/64 in) in size.
The convex bar indicates that it is a front speaker. Use it as a guide to distinguish it from the optional rear speaker.
Use the tactile dots as a guide to distinguish the left front speaker from the right front speaker.
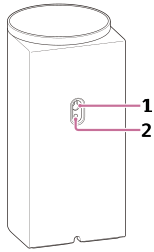
Rear
The illustration below shows the front speaker with the cover on the rear removed.
-
Wall mounting hole
-
Mounting hole for the general speaker stand
This is compatible with the M5 size screw.
Note
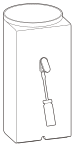
- When using the wall mounting hole (1) or mounting hole for the general speaker stand (2), remove the cover by inserting a flathead screwdriver, etc.
TP1002069000