You can select a file and erase it.
Note
- Once a file has been erased, you cannot retrieve it.
-
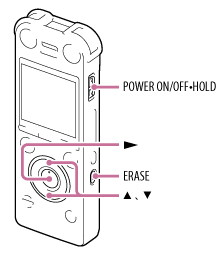
Slide the POWER ON/OFF•HOLD switch in the direction of “POWER ON/OFF” to turn on the IC recorder, or towards the center to release the IC recorder from the HOLD status.
The stop mode window appears.
- Select the file you want to erase when the IC recorder is in the stop or playback mode.
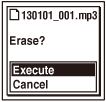
- Press ERASE.
“Erase?” appears and the specified file is played back for confirmation.
- Press
 or
or  to select “Execute.”
- Press
 .
.
The “Erasing...” animation appears in the display window and the selected file will be erased.
When a file is erased, the remaining files will advance so that there will be no space between files.
Note
- You cannot erase a file while the IC recorder is in the transcription playback mode or in the stop mode.
- You cannot erase a protected file. To erase the file, release the protection first, and then erase the file.
- The illustrations used in this Help Guide are based on the ICD-SX1000 model. These illustrations may look different from the model you are using, however, the buttons and controls used for operations are the same.
Hint
- To cancel erasing, select “Cancel” in step 4, and then press .
- To erase a part of a file, divide the file into two files first, and then proceed with steps 3 through 5.