Attaching/removing to/from the camera
Attach the shotgun microphone to a camera.
Note
-
Before attaching/removing this unit to/from a camera, turn off the power to the camera.
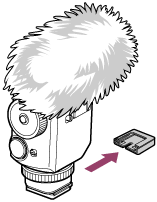
- Remove the connector protect cap from this unit.
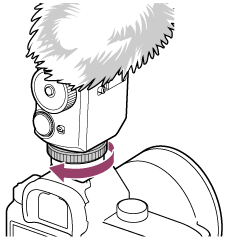
- Release the lock by rotating the lock dial (
 ) and attach this unit to a camera (
 ).
).
Before attaching this unit to a camera, rotate the lock dial counterclockwise until it stops and make sure that the lock is released.
- Rotate the lock dial in the LOCK direction to firmly secure the unit.
Attaching this unit to a camera automatically switches audio input from the built-in microphone to the external microphone.
- Check the position of the DIGITAL/ANALOG switch on this unit.

If your camera is compatible with the digital audio interface of the Multi Interface Shoe, make sure that the switch is set to “DIGITAL.” If not, set the switch to “ANALOG.”
If the switch is not set correctly, a compatibility message will be displayed on the camera. For camera models compatible with the digital audio interface of the Multi Interface Shoe, visit the website at:
- Operate the camera to start recording.
For details, refer to the Help Guide provided for the camera.
To remove the shotgun microphone
Turn off the power to the camera, rotate the lock dial counterclockwise until it stops, and then slide out the Multi Interface foot from the shoe.