Connecting to a paired computer (Windows 8/Windows 8.1)
Before starting the operation, make sure the following:
- Depending on the computer, the built-in BLUETOOTH adaptor should be turned on. For whether or not a BLUETOOTH adaptor is incorporate, and for how to turn it on, refer to the operating instructions supplied with the computer.
- Resume the computer from sleep mode.
- Turn on the headset.
Press and hold the
 button for about 2 seconds.
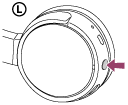
Make sure that the indicator (blue) flashes after you release the button. You hear voice guidance “Power on”.
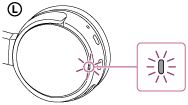
After the headset turns on, if it has automatically connected to the last connected device, you hear voice guidance “BLUETOOTH connected”.
Use the computer to check whether the connection is established, and if it is not established, proceed to step 3.
If the computer has connected to the last BLUETOOTH device connected, disconnect it, then proceed to the next step.
- Select the headset using the computer.
- Select [Desktop] on the Start screen.
- Move the mouse pointer to the top-right corner of the screen (when using a touch panel, swipe from the right edge of the screen), then select [Settings] from the Charm Bar.

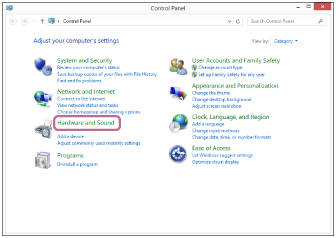
- Select [Control Panel] in the [Settings] charm.
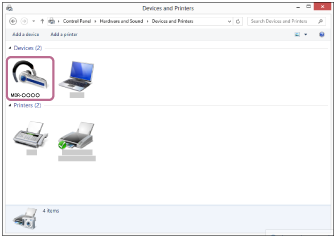
- Select [Hardware and Sound], then [Devices and Printers].
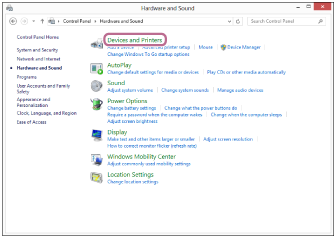
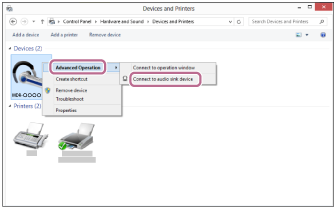
- Right-click [MDR-ZX220BT] in the [Devices and Printers] screen.
- Select [Advanced Operation] — [Connect to audio sink device].
Hint
- The above procedure is an example. For details, refer to the operating instructions supplied with your computer.
- If the computer was connected with the headset the last time, an HFP/HSP connection is made when you turn on the headset. While the headset is on, you can make an A2DP connection (music playback) by pressing the
 button.
Note
- If the headset tries to make a connection with a previously connected BLUETOOTH device, you may not be able to connect to the device you want to. If connection fails, terminate the BLUETOOTH connection from the device that was previously connected.

