Location and function of parts
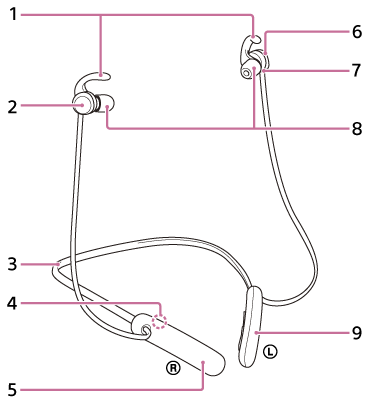
- Arc supporters (right, left)
- Right unit
- Neckband
-
 (right) mark
 - Built-in rechargeable battery
- Left unit
- Tactile dot
There is a tactile dot on the left unit. - Earbuds (right, left)
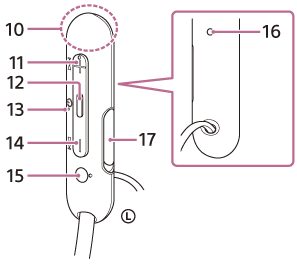
- Remote control component
- Built-in antenna
A Bluetooth antenna is built into the headset. -
+ (volume +)/
 (next) button
There is a tactile dot on the + button. Use this dot as a guide when operating the headset. -
 (play/call)/
 (power) button
 - Indicator (red/blue)
Lights up in red while charging.
Lights up in red or blue to indicate the power or communication status of the headset. -
– (volume –)/
 (previous) button
 -
 (left) mark
There is a tactile dot at the
(left) mark. - Microphone
Picks up the sound of your voice when talking on the phone. - USB Type-C port
Connect the headset to an AC outlet via a commercially available USB AC adaptor or to a computer with the supplied USB Type-C cable to charge the headset.