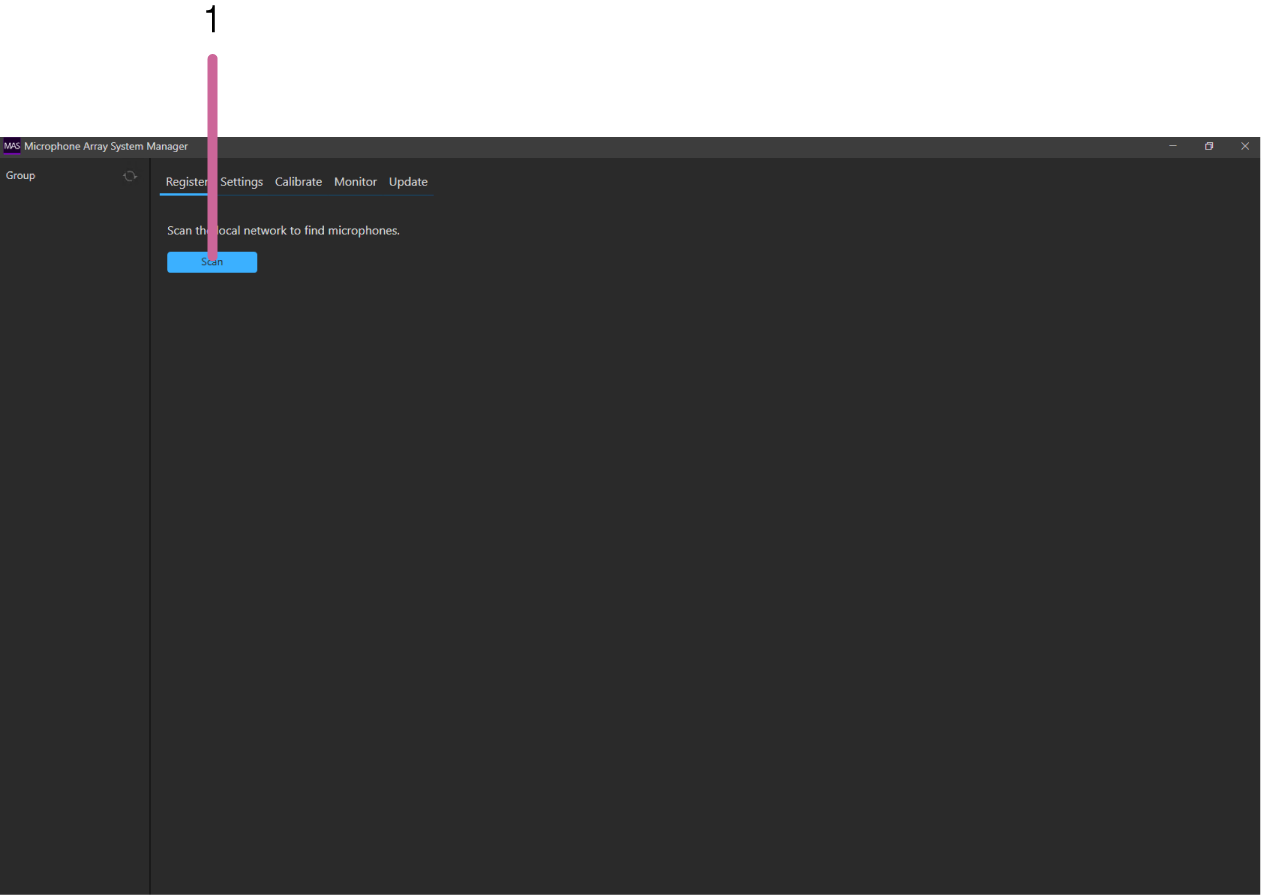
[Register] Tab
MAS-A100 discovery screen
Displayed by selecting the [Register] tab.
-
[Scan] button
Scans for MAS-A100 units connected to the same segment (same layer 2 network) as the computer on which this application is installed.
Scan result screen (1/3)
Displays a list of the discovered MAS-A100 units. You can configure the network connection of each MAS-A100, as required.

-
Checkbox
Place a check mark beside MAS-A100 units that you want to register in this application.
-
[Model name]
Displays the model name.
-
[MAC address]
Displays the MAC address of each MAS-A100.
-
[IP Address]
Displays the IP address of each MAS-A100. Press to change the value.
-
[Subnet mask]
Displays the subnet mask of each MAS-A100. Press to change the value.
-
[Default gateway]
Displays the default gateway of each MAS-A100. Press to change the value.
-
[Status]
Displays error messages for each MAS-A100 if a problem occurs.
-
[Cancel] button
Press to return to the MAS-A100 discovery screen.
-
[Set] button
Applies the configured settings, and displays the next screen.
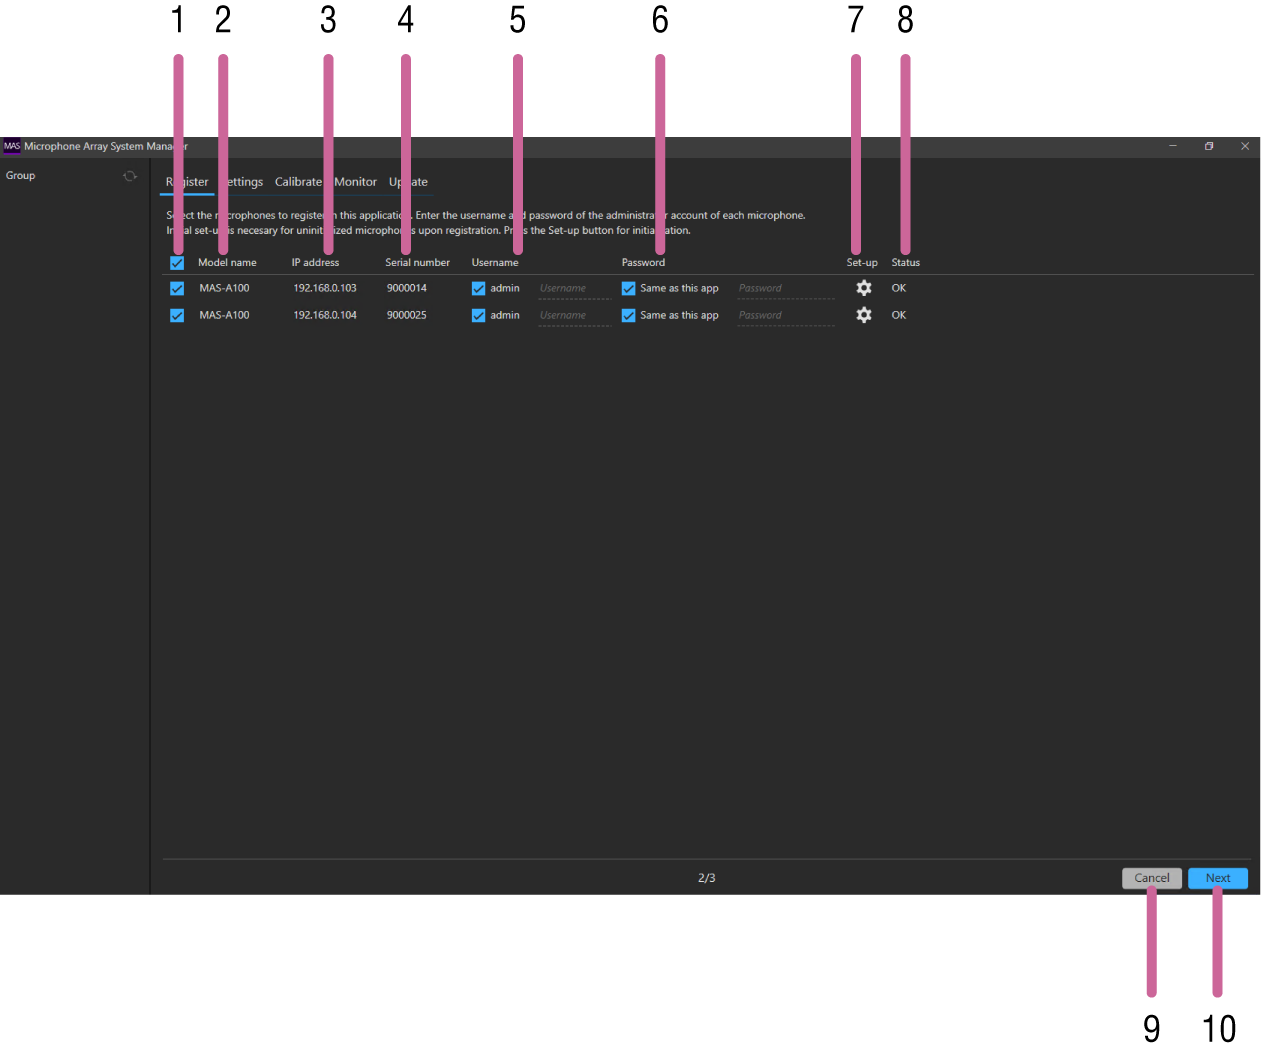
MAS-A100 initial setup screen (2/3)
Displays a list of the MAS-A100 units selected on the scan result screen. Configure the required settings for controlling each MAS-A100 from this application.
-
Checkbox
Place a check mark beside MAS-A100 units that you want to register in this application.
-
[Model name]
Displays the model name.
-
[IP address]
Displays the IP address of each MAS-A100.
-
[Serial number]
Displays the serial number of each MAS-A100.
-
[Username]
Enter the administrator user name comprising 5 to 16 characters for each MAS-A100.
The following characters are valid.
- Alphabetic characters
- Numeric characters
- Symbols ( ! $ % ‘ ( ) = - ~ ^ | @ ` [ { } ] _ / ? < > + * . )
Placing a check mark in [admin] is equivalent to entering the “admin” user name.
-
[Password]
Enter the administrator user password comprising 8 to 64 characters for each MAS-A100.
The following characters are valid.
- Alphabetic characters
- Numeric characters
- Symbols ( ! $ % ‘ ( ) = - ~ ^ | @ ` [ { } ] _ / ? < > + * . )
Placing a check mark in [Same as this app] is equivalent to entering the same password used to log in to this application.
-
[Set-up]
Press the icon to launch Google Chrome with the web UI of the corresponding MAS-A100. The MAS-A100 is initialized using the web UI.
-
[Status]
Displays the status of each MAS-A100.
If [OK] is not displayed, it indicates that some further action is required in order to register the MAS-A100 in this application.
[OK]: Indicates that the MAS-A100 is ready to be registered in this application.
[Uninitialized]: MAS-A100 unit is in the factory default state. Initialize (set up) the MAS-A100.
[IP address is not accessible.]: IP address of the MAS-A100 cannot be accessed. Check the network connection, IP address setting of the MAS-A100, and HTTP proxy setting of the PC running this application.
[Username and Password do not match.]: Settings entered in [Username] or [Password] do not match the settings configured on the MAS-A100. Enter the correct settings.
-
[Cancel] button
Press to return to the MAS-A100 discovery screen.
-
[Next] button
Applies the configured settings, and displays the next screen.
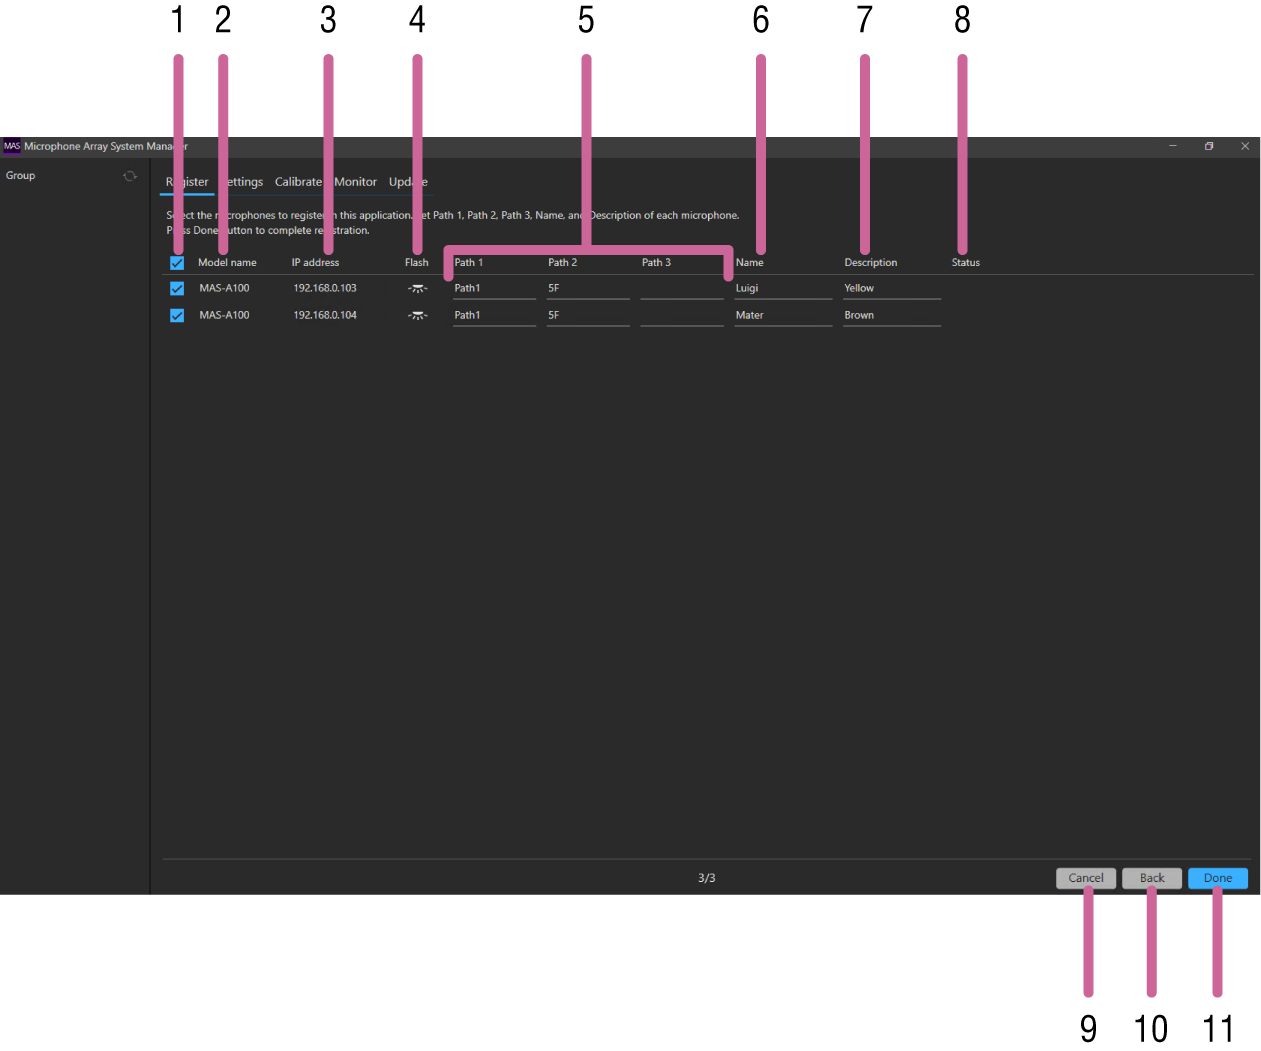
MAS-A100 information setup screen (3/3)
Displays a list of the MAS-A100 units selected on the MAS-A100 initial setup screen. Configure information, such as the location, to identify each MAS-A100 unit.
-
Checkbox
Place a check mark beside MAS-A100 units that you want to register in this application.
-
[Model name]
Displays the model name.
-
[IP address]
Displays the IP address of each MAS-A100.
-
[Flash]
Press the icon to start the LED of the MAS-A100 flashing.
-
[Path 1], [Path 2], [Path 3]
Enter information, such as name of building, floor number, and room name.
[Path 1] input is mandatory. Enter a character string comprising 4 to 16 characters.
Character strings up to 16 characters can be entered in [Path 2] and [Path 3]. If a character string is entered in [Path 3], input in [Path 2] becomes mandatory.
The following characters are valid.
- Alphabetic characters
- Numeric characters
- Symbols ( ! $ % ‘ ( ) = - ~ ^ | @ ` [ { } ] _ / ? < > + * . )
Character strings entered in [Path 1], [Path 2], and [Path 3] are used by this application as the names of groups displayed on the [Group] pane for grouping microphones. Normally, MAS-A100 units located within the same room must have the same entries for [Path 1], [Path 2], and [Path 3].
-
[Name]
Enter a name comprising 4 to 16 characters to identify the MAS-A100.
Input is mandatory.
The following characters are valid.
- Alphabetic characters
- Numeric characters
- Symbols ( ! $ % ‘ ( ) = - ~ ^ | @ ` [ { } ] _ / ? < > + * . )
-
[Description]
Enter a character string of up to 16 characters describing the MAS-A100.
The following characters are valid.
- Alphabetic characters
- Numeric characters
- Symbols ( ! $ % ‘ ( ) = - ~ ^ | @ ` [ { } ] _ / ? < > + * . )
-
[Status]
Displays error messages for each MAS-A100 if a problem occurs.
-
[Cancel] button
Press to return to the MAS-A100 discovery screen.
-
[Back] button
Press to return to the scan result screen.
-
[Done] button
Press to register each MAS-A100 with the configured content in this application.