[Settings] Tab
Parts common to all pages
-
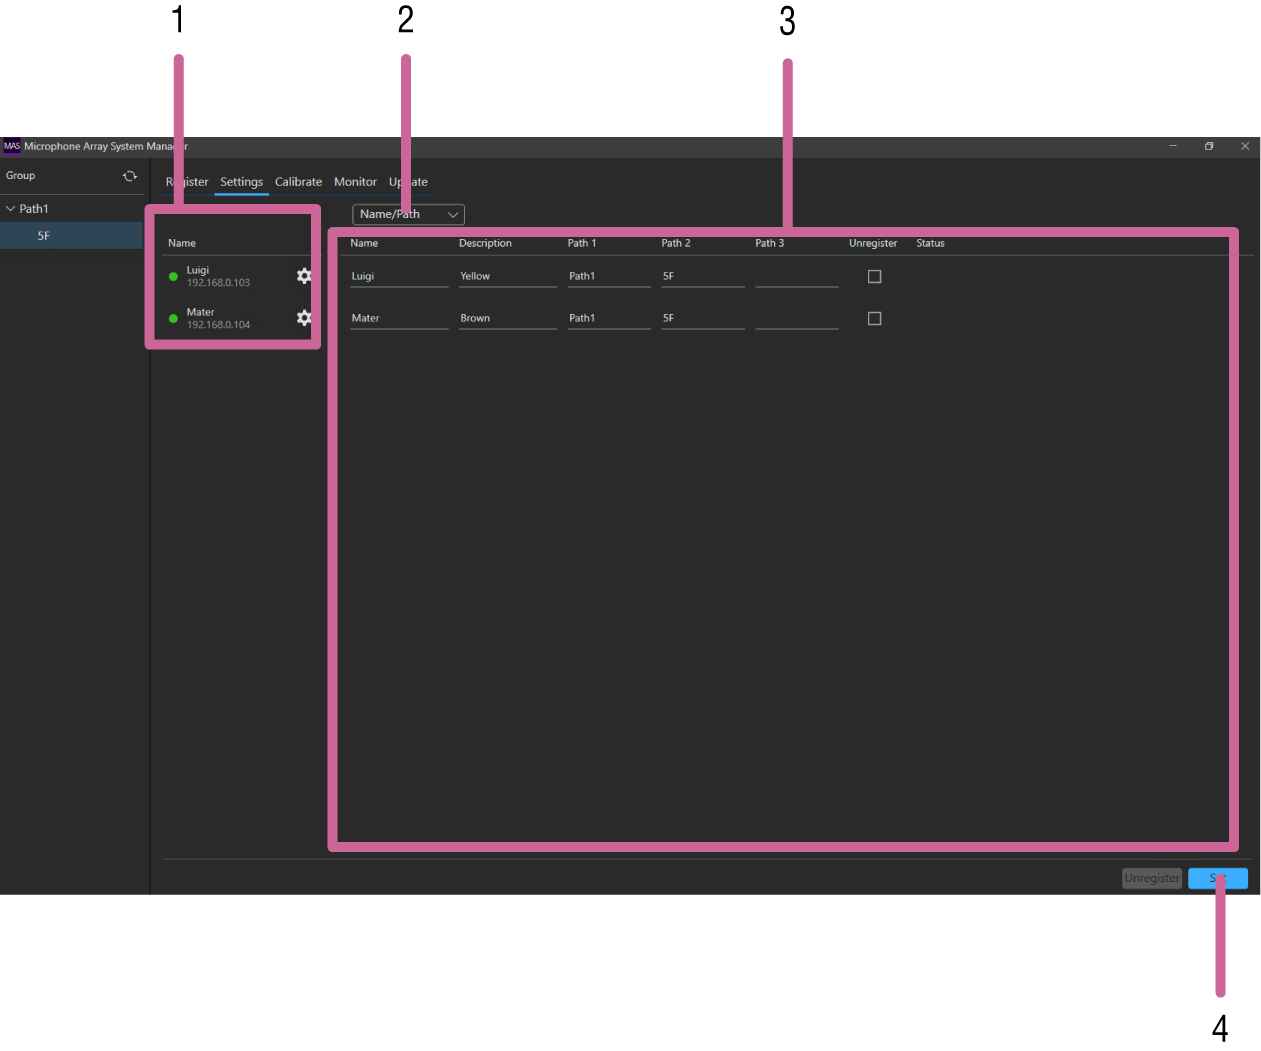
[Name]
Displays the configured name and IP address of each MAS-A100.
Press
 to display the web UI of each MAS-A100.
The color of the status lamp indicates the status of the MAS-A100.
Green (Active): Audio for speech reinforcement is output from the Main output and Rec output of the MAS-A100.
Amber (Mute): Main output of the MAS-A100 is temporarily silent. The Rec output audio is output.
Red (Standby): Main output and Rec output of the MAS-A100 are silent, and temporary MAS-A100 settings (values configured on the [Calibrate] tab or [Audio] page) are reset to defaults.
Gray (offline): MAS-A100 is not accessible. The MAS-A100 settings cannot be changed.
-
Pull-down menu
Select the page to display.
-
Parameter display area
Displays the content of the page selected using the pull-down menu.
-
[Set] button
Press to apply the changed settings.
[Name/Path] page
This page is used to change the settings configured when the MAS-A100 was registered.

-
[Name]
Enter a name comprising 4 to 16 characters to identify the MAS-A100.
Input is mandatory.
The following characters are valid.
- Alphabetic characters
- Numeric characters
- Symbol characters ( ! “ ‘ ( ) * + - . _ < > )
-
[Description]
Enter a character string of up to 16 characters describing the MAS-A100.
The following characters are valid.
- Alphabetic characters
- Numeric characters
- Symbol characters ( ! “ ‘ ( ) * + - . _ < > )
-
[Path 1], [Path 2], [Path 3]
Enter information, such as name of building, floor number, and room name.
[Path 1] input is mandatory. Enter a character string comprising 4 to 16 characters.
Character strings up to 16 characters can be entered in [Path 2] and [Path 3]. If a character string is entered in [Path 3], input in [Path 2] becomes mandatory.
The following characters are valid.
- Alphabetic characters
- Numeric characters
- Symbol characters ( ! “ ‘ ( ) * + - . _ < > )
Character strings entered in [Path 1], [Path 2], and [Path 3] are used by this application as the names of groups displayed on the [Group] pane for grouping microphones. Normally, MAS-A100 units located within the same room must have the same entries for [Path 1], [Path 2], and [Path 3].
-
[Unregister] checkbox
Place a check mark beside MAS-A100 units that you want to unregister from this application.
-
[Unregister] button
Press to unregister the MAS-A100 units for which a check mark is placed in the [Unregister] checkbox.
-
[Status]
Displays error messages for each MAS-A100 if a problem occurs.
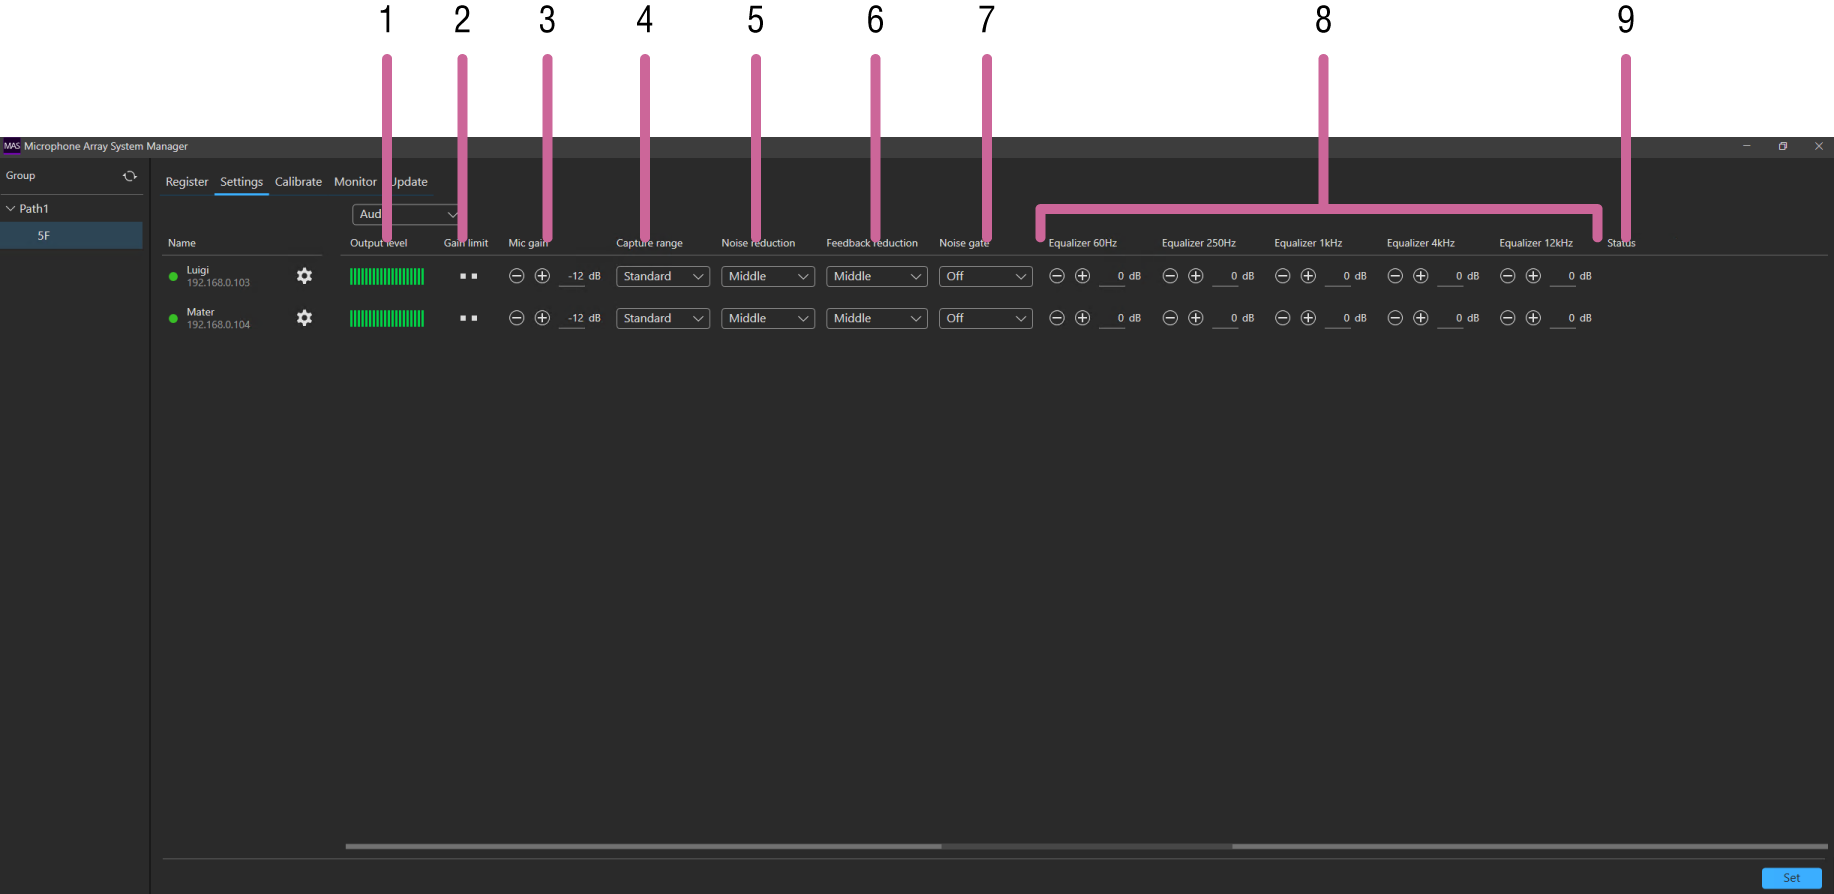
[Audio] page
This page is used to check/change the audio settings of the MAS-A100.
Note
- The settings specific to the Main output and settings that are common to both the Main output and Rec output can be checked/changed. Check/change Rec output settings using the web UI of the MAS-A100.
-
[Output level]
Displays the output level using a green audio level bar. This cannot be changed.
-
[Gain limit]
Displays the gain limit status.
When one lamp is displayed, the microphone gain has reached the limit for suppressing feedback and maintaining audio quality.
When two lamps are displayed, the microphone gain has exceeded the limit and that audio quality has deteriorated.
To avoid deterioration in audio quality, set the microphone gain in the range so that the gain limit lamps are not lit or only one lamp is lit.
-
[Mic gain]
Displays the default value of the microphone gain.
Press the +/– buttons, or press the value and enter a new value directly, to change the setting.
Changes are applied immediately without pressing the [Set] button.
-
[Capture range]
Selects the capture range.
-
[Noise reduction]
Selects the noise reduction level.
-
[Feedback reduction]
Selects the feedback reduction level.
-
[Noise gate]
Selects the noise gate level.
-
[Equalizer 60Hz], [Equalizer 250Hz], [Equalizer 1kHz], [Equalizer 4kHz], [Equalizer 12kHz]
Displays the default equalizer value for each frequency.
Press the +/– buttons, or press the value and enter a new value directly, to change the setting.
Changes are applied immediately without pressing the [Set] button.
-
[Status]
Displays error messages for each MAS-A100 if a problem occurs.
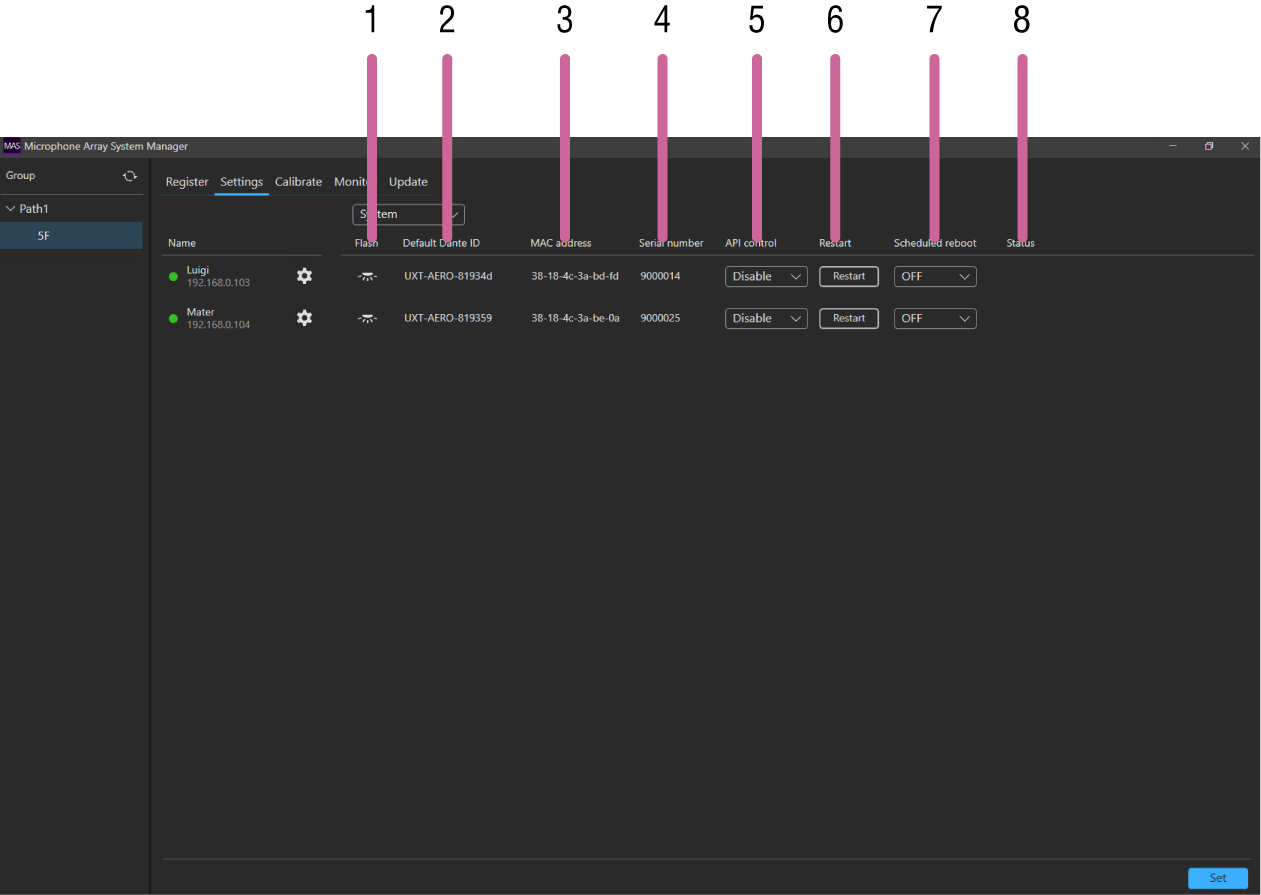
[System] page
This page is used to check/change the system settings of the MAS-A100.
-
[Flash]
Press the icon to start the LED of the MAS-A100 flashing.
-
[Default Dante ID]
Displays the Default Dante ID of each MAS-A100.
-
[MAC address]
Displays the MAC address of each MAS-A100.
Note
- The value displayed is the MAC address used for MAS-A100 settings and operation. The MAC address for use as a Dante device is shown by Dante Controller.
-
[Serial number]
Displays the serial number of each MAS-A100.
-
[API control]
Selects whether to enable control of the MAS-A100 from an external device.
-
[Restart] button
Press to restart the MAS-A100.
-
[Schedule reboot]
You can set a time to reboot the MAS-A100 automatically.
To disable automatic rebooting of the MAS-A100, set to [OFF].
-
[Status]
Displays error messages for each MAS-A100 if a problem occurs.