Updating Firmware
-
Download the applicable package file for the update target device as described in “Preparation,” and connect the device to your computer.
-
Launch this software.
-
Click [Browse] and select the package file saved previously from the displayed screen.
A message may appear if the previous update process did not finish successfully. In that case, apply the update again for the displayed device, check that the device is updated successfully, and then use the device. Do not use a device for which the update was not successful.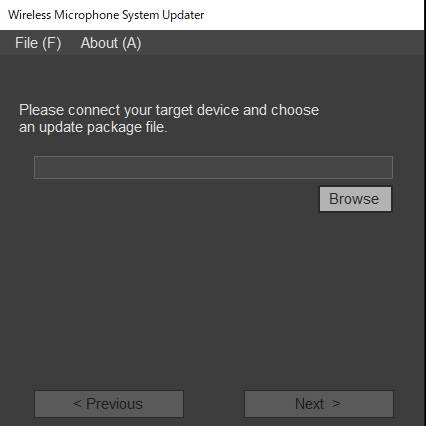
-
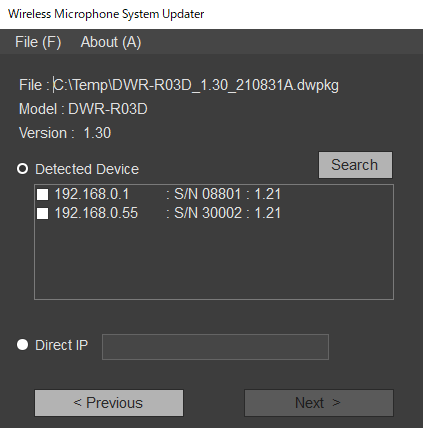
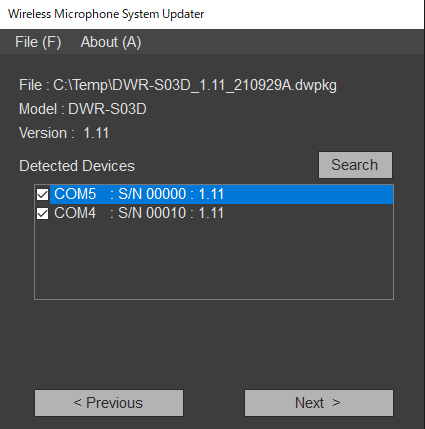
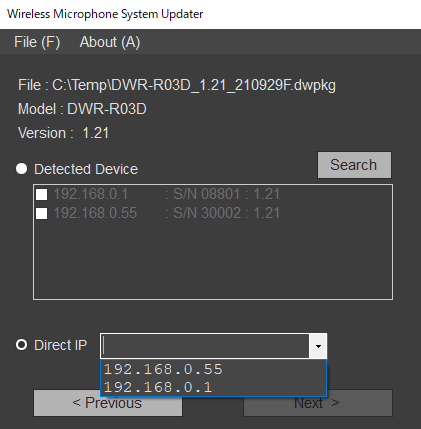
Click [Next].The devices that are compatible with the selected package file are detected automatically, from among the devices connected to the computer, and are displayed on the screen. If your device is not displayed, check the connection between the device and the computer, and then click [Search] to scan for the device. “Not Found” is displayed if the device cannot be detected.
If the firmware version of a connected device is not an update target of the selected package file, the update cannot proceed (an error will appear).For USB connection devices

For Ethernet connection devices
To enter an IP address directly, click [Direct IP] and enter the address in the text box. You can also select an IP address of a device for which a previous update failed from the drop-down list.
Note
- If the 4th octet (D part in A.B.C.D) of the IP address of a detected target device to update or the IP address entered in [Direct IP] is set to “0” or “255,” do not execute the update. Change the IP address of the target device as described in the Note in “Connecting devices” in the “Preparation” topic.
-
Place a check mark in the checkbox for the device you want to update.
Note
- Limit the number of devices updated at the same time to 10 or lower.
-
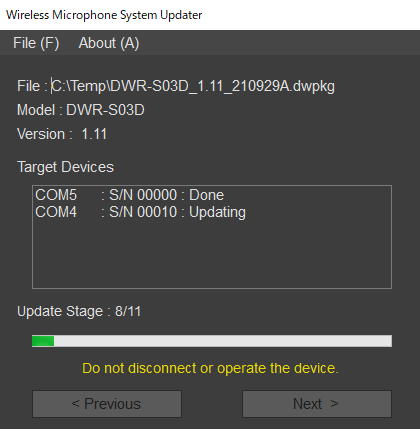
Click [Next].The update starts.When the update finishes successfully, a confirmation message appears.
Note
- While the update is in progress, do not disconnect the cable connecting the device and the computer, and do not operate the device.
- Do not turn off the device while updating.
- If the update is unsuccessful due to the cable being disconnected or other cause while updating, turn the device off and then on again, and then start the update again. In this case, nothing may be displayed on the display of the device, depending on the state where the previous updated stopped. Depending on the device, the cable and battery may need to be removed to turn off the device. If an error message appears, see “Error Messages.”
- If the update of an Ethernet connection device fails with error code (0x40) or (0x21), nothing is displayed on the display of the device, and the target device cannot be detected by clicking [Search], enter the IP address that failed in [Direct IP] and execute the update again. If the update does not start when executed again, perform the update using the following procedure.
- Make sure that your computer and the target device to update are the only devices on the same network segment of the same network (disconnect the network cable or turn off the power of other devices).
- Set the IP address of the computer to “192.168.0.X” (where X is a value in the range 2 to 254).
- Set the subnet mask of the computer to “255.255.255.0”.
- Enter “192.168.0.1” in [Direct IP].
- Click [Next].
- For devices for which an update failed, apply the update again, and check that the update is successful before use.
- For USB connection devices, it takes some time to establish the connection with a device after [Next] or [Search] is clicked. You may have to wait about 30 seconds before proceeding to the next screen.
-
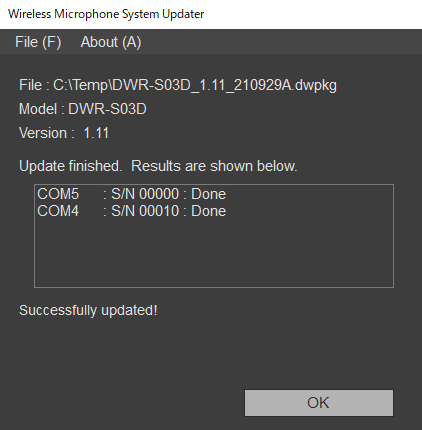
Click [OK].When the update process finishes, the result is displayed as follows.
- [Done]: Update succeeded
- [Failed]: Update failed
- [Not Updated]: Update process not applied
- [Not Found]: Device could not be detected when executing an update
-
Turn off the connected device, turn the device on again, and check the version of the device.For details about checking the version, refer to the operating instructions of the device.
For devices for which an update failed, apply the update again, and check that the update is successful before use.
When multiple devices are selected for update
If a device update fails during the process, the following message may appear.
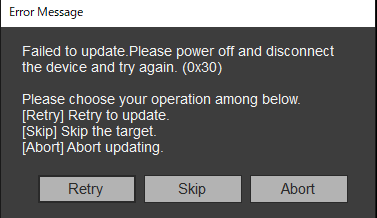
To attempt to update the device whose update failed, click [Retry]. To skip the device whose update failed and move to the update process for the next device, click [Skip]. To exit the update process, click [Abort].
When a message is displayed after an unsuccessful update
If a previous attempt to update an Ethernet connection device was unsuccessful, the following message may appear after selecting a package file.
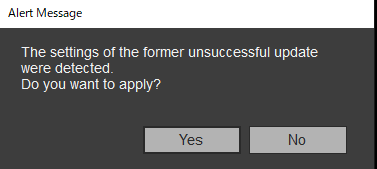
To execute the update process using the IP address specified during the unsuccessful update attempt, click [Yes]. The information for the previous update attempt is deleted if you click [No]. In this case, click [Direct IP], specify the IP address directly or select the IP address of the target device from the pull-down list, and then apply the update.
For USB connection devices, only a message appears.
Note
- If the 4th octet (D part in A.B.C.D) of the IP address entered in [Direct IP] is set to “0” or “255,” do not execute the update. Change the IP address of the device as described in the Note in “Connecting devices” in the “Preparation” topic.
To exit the application
Click [Exit] in the [File] menu of the menu bar to exit the application.