Operation Flow from Recording to Editing to Saving
The following describes a series of operations for using Hi-Res Audio Recorder to record audio tracks of a vinyl record to the temporary file, edit the temporary file, and then save the audio tracks as recorded files on your computer.
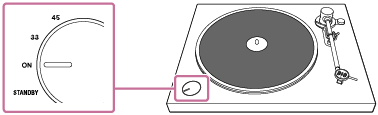
- Turn on the turntable.
For detailed information, see “Step 1. Turning On the Turntable.”
- Start Hi-Res Audio Recorder on the computer.
For detailed information, see “Step 2. Starting Hi-Res Audio Recorder .”

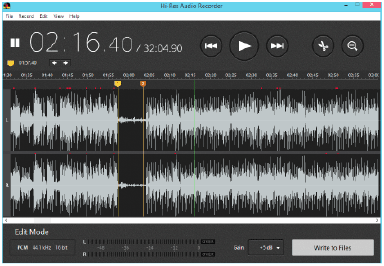
- Play a vinyl record and record its audio tracks to the temporary file with Hi-Res Audio Recorder.
For detailed information, see “Step 3. Playing a Vinyl Record and Recording Audio Tracks with Hi-Res Audio Recorder .”

- Edit the temporary file by adding markers or adjusting the signal level (gain).
For detailed information, see “Adding a Marker” or “Adjusting the Signal Level for the Recorded Audio Tracks (Gain Adjustment).”
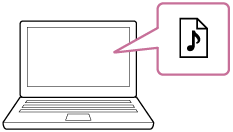
- Export the temporary file to save on the computer.
For detailed information, see “Exporting the Temporary File Containing Recorded Audio Tracks.”
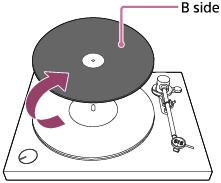
- To record the B side of the vinyl record following the A side, turn over the record and start the recording.
Click [File] - [New] on the menu bar of the Hi-Res Audio Recorder window, and then repeat steps 3 through 5.
Hint
-
You can also record both A and B sides of the vinyl record consecutively and then edit and export the temporary file by following the steps below.
- When you are finished with recording the A side in step 3 above, click the
 (Pause Recording) button.
 - Turn over the record and follow steps 3 through 5.
- When you are finished with recording the A side in step 3 above, click the