Wireless flash photography <with the receiver unit>
You can specify either of the following devices as the commander unit, and then use the commander unit to trigger the flash operation of this flash unit placed away from the camera.
-
another flash unit that is attached to the camera and supports radio wireless communications
-
the radio wireless commander that is attached to the camera
 : Commander unit (CMD)
 : HVL-F60RM/HVL-F60RM2/HVL-F46RM (RCV)
As the commander unit, you can use this flash unit or a radio wireless commander.
- Select the wireless (WL) flash mode on the camera.
For selecting the flash mode on the camera, refer to the operating instructions supplied with the camera.
- Press the WL button on this flash unit and select [RCV].
- Press the Fn button and specify the wireless group of this flash unit for wireless group selection on the Quick Navi screen.
- Attach the mini-stand to this flash unit.
- Attach another flash unit of the same model or a radio wireless commander specified as the commander unit ([CMD] is selected) to the camera.
Make sure that [CMD] is displayed on the LCD panel of the commander unit.
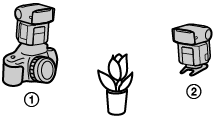
- Place the camera and this flash unit.
- Make sure that the flash unit on the camera (commander unit) and this flash unit (receiver unit) are wirelessly connected and ready to fire.
-
Wirelessly connected:
The LINK lamp is lit in green.
-
Ready to fire:
-
The TEST button on the back of this flash unit is lit in orange.
-
HVL-F60RM: While [ON] is selected for [WL READY LAMP] on the MENU screen, the AF illuminator on the front of the receiver unit blinks.
-
-
- Press the shutter button to take a photo.
To fire a test-flash, press the TEST button on the commander unit.
Hint
-
On the receiver units, the flash mode of the commander unit is applied.
-
During manual flash photography, you can enable adjustment on the commander unit by selecting [CMD LINK] for the flash power level setting on the Quick Navi screen.