

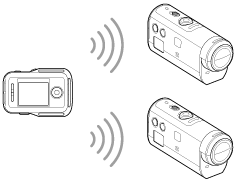
Connecting this unit to multiple cameras via Wi-Fi
You can connect a maximum of five cameras to this unit and operate all cameras simultaneously.
- Turn on this unit.
- Press the MENU button.
- The list of setting items is displayed.
- Press the UP button or DOWN button to select
 (Remote control settings) -
  (Connection mode) -
  (Multi connection) and press the REC/ENTER button.
 - Press MENU button.
- Press the UP button or DOWN button to select
 (Device registration), then press the REC/ENTER button.
 - Turn on the camera.
- Connect to the camera.
- Action cam excluding HDR-AZ1
Select [MULTI]-[NEW] in the Wi-Fi settings.
- HDR-AZ1/Lens-style Camera (QX series)
Press the Wi-Fi button of the camera and switch the connection mode of the camera to the multi connection mode, then press and hold the Wi-Fi button of the camera.
- Refer to the Help Guide of the camera on the website for how to switch the connection mode of the camera.
- Action cam excluding HDR-AZ1
- Select
 of this unit and press the REC/ENTER button.
- The requested connection is accepted and the LCD screen of this unit switches to Live-View display.
- If you will continue to connect multiple cameras, repeat from step 5.
Note
- Register cameras before connection standby mode of this unit is canceled.
- The multi camera control function is only available with the compatible cameras.
- When operating a camera that does not support the multi camera control function, set the connection mode to (Single connection).
- You cannot copy images recorded in the camera to this unit.
- The WPS method is used for connecting the Live-View Remote to multiple cameras. If there is another device using the WPS method in the vicinity of the cameras, the registration may fail. If the registration fails, reconnect by performing each step again.