

Connecting this unit to a single camera via Wi-Fi
You can operate the camera at a distance when the camera is connected to this unit via Wi-Fi.
- Turn on this unit.
- The Wi-Fi standby screen is displayed.

- Turn on the camera.
- Action Cam excluding HDR-AZ1
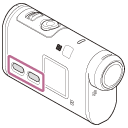
Press the NEXT or PREV button.
- HDR-AZ1/Lens-style Camera (QX series)
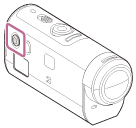
Press the ON/OFF (Power) button.
- Action Cam excluding HDR-AZ1
- Check the camera setting.
- Action Cam excluding HDR-AZ1

- HDR-AZ1/Lens-style Camera (QX series)
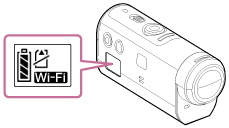
- Check that a Wi-Fi mark is displayed on the display panel of the camera.
- For DSC-QX100/QX10, the Wi-Fi indicator is not displayed on the camera display.
- If the connection mode of the camera is set to the multi connection, switch to the single connection.
- For HDR-AS15/AS30V, insert a memory card to the camera.
- Action Cam excluding HDR-AZ1
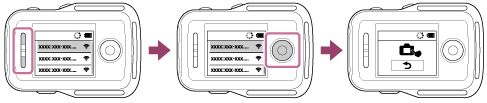
- Select the camera you want to connect to this unit.
- Press the UP button or DOWN button to select the SSID (the destination) from the list.
- Press the REC/ENTER button.
- When this unit is in the standby status, proceed to step 5 within 2 minutes.
- If you press the REC/ENTER button in the standby status, the remote control will be released from the standby status. In this case, select the SSID of the camera again.
- If the SSID is not displayed, check that the camera is in single connection mode. Refer to the Help Guide of the camera on the website for how to check the connection mode of the camera.
- Connect this unit to the camera.
- Action Cam excluding HDR-AZ1
When [ACPT?] is displayed on the display panel of the camera, press the ENTER button of the camera.
- If [ACPT?] is not displayed on the display panel of the camera, restart the camera and try again from step 3.

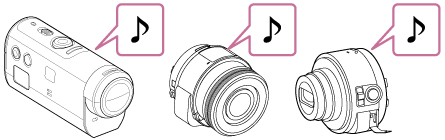
- HDR-AZ1/Lens-style Camera (QX series)
When you hear the connection confirmation beep, press and hold the Wi-Fi button of the camera (Shutter button for the DSC-QX100/QX10) until you hear the connection beep.
- If the connection confirmation beep does not sound, restart the camera and try again from step 3.
- If the beep is set to OFF, the connection confirmation beep does not sound.
- After the connection is established, the LCD screen of the remote control switches to the Live-View display and the REC/Wi-Fi lamp lights in blue.

Note
- Once all steps are completed, this unit and the camera will be automatically connected when you turn on the power.
- The SSID of the camera is displayed on this unit with “DIRECT-” removed.
- You cannot copy images recorded in the camera to this unit.
- Action Cam excluding HDR-AZ1
If you cannot connect this unit to the camera via Wi-Fi / if the connection is not established
- If this unit cannot connect to the camera via Wi-Fi, check that the camera is in single connection mode.
If the camera is not in the single mode, change the connection mode and reconnect it.
- If the connection to the camera is not completed, the signal traffic may be heavy. In this case, move to another location and try again.