Location and function of parts
Headset
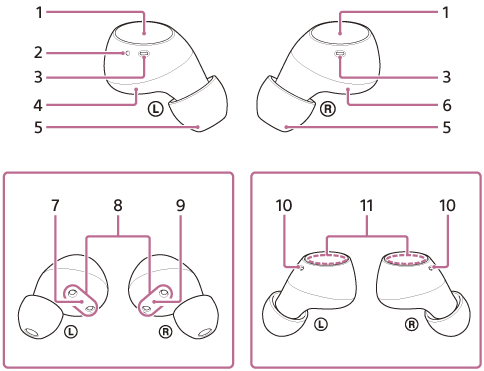
-
Buttons (left, right)
Press to operate the headset. -
Tactile dot
The left headset unit has a tactile dot. -
Air holes (left, right)
-
Left unit of the headset
-
Earbud tips (left, right)
-
Right unit of the headset
-
 (left) mark
 -
Charging ports
-
 (right) mark
 -
Microphones (left, right)
Picks up the sound of your voice when talking on the phone. -
Built-in antennas (left, right)
A Bluetooth antenna is built into each left or right unit of the headset.
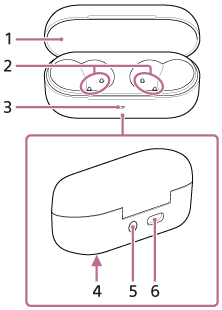
Charging case
-
Lid
-
Charging ports
-
Indicator (blue/orange/green)
Indicates the remaining battery life of the headset units and charging case, the charging status, or the status of the pairing mode. -
Serial number
Located on the bottom of the charging case. -
Pairing/reset/initialize button
Used when entering pairing mode, resetting or initializing the headset. -
USB Type-C® port
Using a commercially available USB Type-C cable, connect the charging case to a computer or to an AC outlet via a commercially available USB AC adaptor to simultaneously charge both the headset and the charging case.