Attaching/removing the XLR adaptor to/from the camera
Attach the XLR adaptor to a camera.
Note
-
Before attaching/removing the adaptor to/from a camera, turn off the power to the camera.
- Remove the connector protect cap from the XLR adaptor.

- Slide the Multi Interface foot of the XLR adaptor into the shoe on the camera (
 ), and then rotate the lock dial in the “LOCK” direction (
 ) to firmly secure the adaptor.
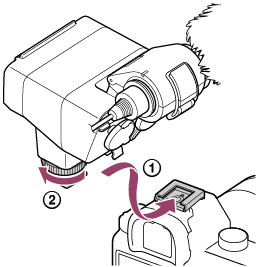
When it is difficult to insert the Multi Interface foot into the shoe, rotate the lock dial counterclockwise until it stops, and then try again.
To remove the XLR adaptor
Turn off the power to the camera, rotate the lock dial counterclockwise until it stops, and then slide out the Multi Interface foot from the shoe.
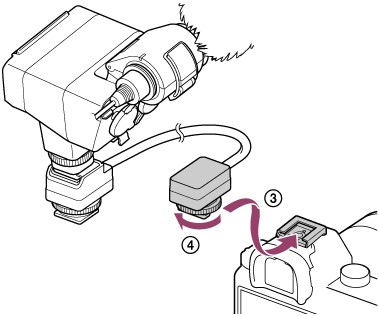
To use the Extension Cable for Audio for attachment
Alternatively, you can use the supplied Extension Cable for Audio to attach the XLR adaptor to the camera.
Use of this cable for attachment comes in handy when you stand away from the camera and use the microphone attached to the XLR adaptor for recording.
Note
-
Using the supplied Extension Cable for Audio with products other than XLR-K3M may affect its performance, leading to accidents or malfunction.
-
Remove the connector protect caps from the XLR adaptor and the Extension Cable for Audio.
-
Slide the Multi Interface foot of the XLR adaptor into the shoe of the Extension Cable for Audio (
), and then rotate the lock dial in the “LOCK” direction () to firmly secure the adaptor. 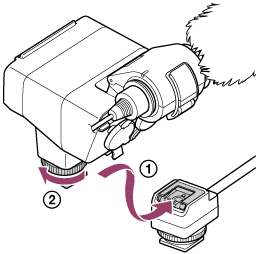
-
Slide the Multi Interface foot of the Extension Cable for Audio in to the shoe on the camera (
 ), and then rotate the lock dial in the “LOCK” direction (
 ) to firmly secure the cable.