Using the supplied microphone
Use the supplied microphone that you attached to the XLR adaptor following the instructions in “Attaching/removing the supplied microphone” for recording.
You can record super-directional monaural sound.
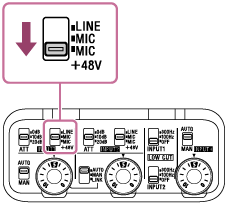
- Make sure that the INPUT1 (LINE/MIC/MIC+48V) switch is set to “MIC+48V.”
- Set the ATT (INPUT1) switch to “10dB.” (Recommended)
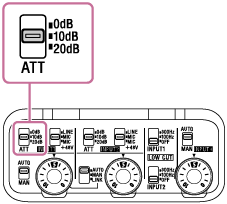
With the ATT switch, you can set the standard input level suitable for the sensitivity of the microphone connected to the XLR adaptor or for the volume level of the input audio. When using the supplied microphone, it is recommended that you set the switch to “10dB.”
To use a microphone other than the supplied one or an external device, see “Using a device, such as an external audio device.”
- Set the INPUT SELECT switch to “IN1.”
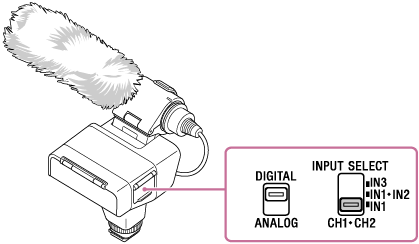
The audio from the microphone connected to the INPUT1 jack is recorded to both the CH1 and CH2 channels on the attached camera.
- Adjust the recording volume level.
For detailed instructions on adjustment, see “Adjusting the recording volume level.”
- Operate the camera to start recording.
For details, refer to the Help Guide provided for your camera.
Note
-
Adjustment of the recording volume level on the attached camera does not work.