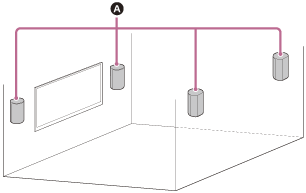
Mounting the Speakers on a Wall
 Speakers
Note
- Prepare screws (not supplied) that are suitable for the wall material and stability. Depending on the wall material, the wall may be damaged.
- Fasten the screws securely in the wall beam.
- Hang the speakers horizontally on the reinforced wall.
- Have the installation done by a Sony dealer or licensed contractor and pay special attention to safety during the installation.
- Sony shall not be held responsible for accidents or damage caused by improper installation, insufficient wall stability, improper screw installation, natural disasters, etc.
-
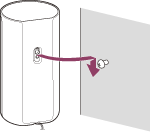
Prepare screws (not supplied) that are suitable for the wall mounting hole on the rear of the speaker.
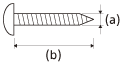
(a) 4 mm (5/32 in)
(b) More than 30 mm (1 3/16 in)
Hole on the rear of the speaker
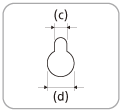
(c) 4.2 mm (11/64 in)
(d) 9.6 mm (3/8 in)
-
Fasten the screw in the wall.
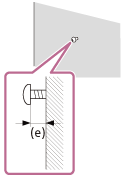
(e) Approx. 7.35 mm (approx. 19/64 in)
-
Peel off the cover on the rear of the speaker with a safety-pin, etc.
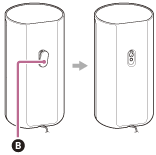
 Cover
Cover
-
Hang the speakers by confirming the type of the speakers.
Check the label on the bottom of the speaker.
-
 Front left
 -
 Front right
 -
 Rear left
 -
 Rear right
-
Note
- Keep the cover that is peeled off in step 3 for use when you do not mount the speaker on a wall.