Location and function of parts
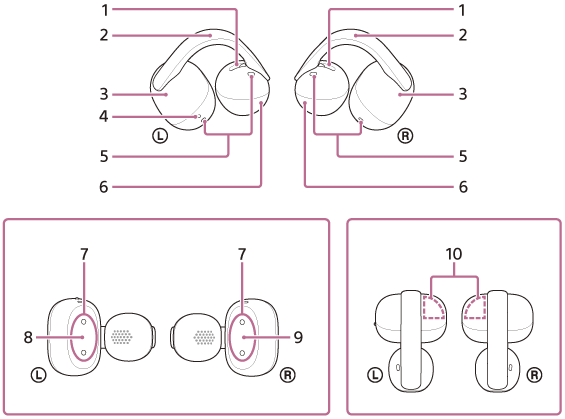
Headset
-
Air holes (left, right)
-
Flexible clip (left, right)
-
Earcuff body (large) (left, right)
-
Tactile dot
There is a tactile dot on the left-side headset unit.
-
Microphones (left, right)
-
Earcuff body (small) (left, right)
-
Charging ports (left, right)
-
 (left) mark
 -
 (right) mark
 -
Built-in antennas (left, right)
A Bluetooth antenna is built into both left and right units of the headset.
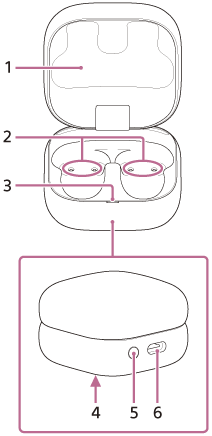
Charging case
-
Charging case lid
-
Charging ports (left, right)
-
Indicator (green/orange/blue)
Indicates the remaining battery charge of the headset units and charging case, the charging status, or the status of the pairing mode.
-
Serial number
Located on the bottom of the charging case.
-
Pairing/reset/initialize button
Used when entering pairing mode, resetting or initializing the headset.
-
USB Type-C® port
Charge both the headset and the charging case using one of the following methods with a commercially available USB Type-C cable.
- Connect the charging case to a computer
- Connect the charging case to an AC outlet using a commercially available USB AC adaptor