Maintenance
Perform regular maintenance by following the procedures below.
-
Clean the headset.
Cleaning the headset units
Dust and dirt on the exterior of the headset can be wiped off with pure water type wet wipes. Do not use wet wipes such as those containing alcohol, thinner, or benzene as they may damage the finish on the surface of the headset or cause other damages.
Use a soft dry cloth to wipe off any water that gets on the headset units.
Do not allow the headset to remain with water droplets attached in a cold environment as the water may freeze.
Cleaning the charging ports
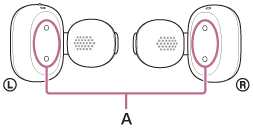
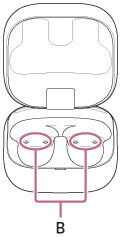
If foreign matter or moisture, such as sweat, is left on the charging ports (A) of the headset or the charging ports (B) of the charging case, charging port corrosion may occur and prevent charging.
When you have finished using the headset, make sure to gently clean the charging ports with a soft dry cloth or cotton swab.
When the headset cannot be charged, it may help to try thoroughly cleaning the charging ports.
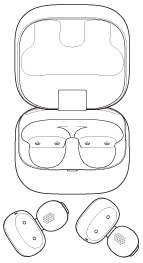
Charging ports that need maintenance
-
Headset
-
Charging case
Note
- Do not use an air duster or similar products to remove dust or debris.
Dust and other debris may enter the sound output holes and cause malfunction.
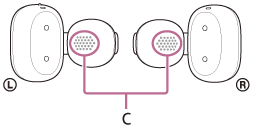
Cleaning the driver unit part
If foreign material such as earwax becomes attached to the sound output hole (C), the sound may become muffled or difficult to hear.
To prevent foreign material such as earwax from attaching, regularly clean using one of the following methods.
- Tissue
- Pure water wet wipes
- Cloth moistened with water and wrung out tightly
If dirt is already lodged in the sound output hole (C) and cannot be removed using the above methods, use a clean, soft brush. When using a brush, gently sweep the surface to remove dirt.
Do not use wet wipes containing alcohol, thinner, benzene, etc. as they may cause malfunction or damage.
Note
- To prevent damage to internal components, do not insert the brush deeply into the hole.
- Do not push dirt further into the sound output hole.
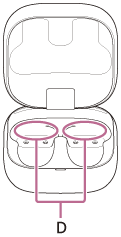
Cleaning the holes of the charging case
Clean the holes (D) where the earcuff body (large) fits with a cotton swab, etc.
Drying the headset
After cleaning is complete, leave the headset to dry thoroughly at room temperature.
-
-
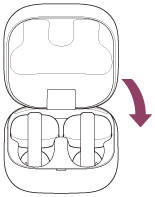
Set the headset in the charging case.
After maintenance as well as after cleaning and drying the headset, be sure to set the headset units in the charging case.
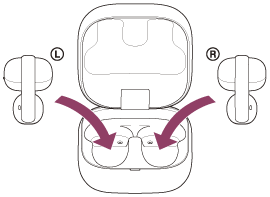
Be sure to close the charging case lid.