Attaching/removing a microphone (not supplied)
This topic explains an example of attaching a typical condenser microphone (monaural) to the INPUT1 jack on this unit.
Note
-
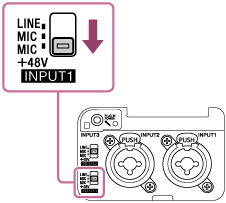
Before attaching/removing the microphone to this unit, be sure to set the INPUT1 (LINE/MIC/MIC+48V) switch to the position other than “MIC+48V.” While the switch is set to “MIC+48V,” plugging/unplugging the microphone may cause a loud noise or a malfunction of the microphone.
-
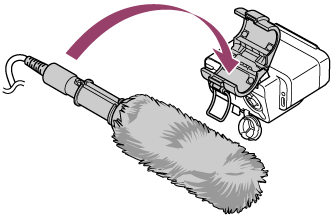
The microphone shown in the illustration is not supplied.
Hint
-
It is recommended to attach a windscreen to the microphone. If necessary, use a microphone spacer as well.
- Unlock the microphone holder and open the lid of the holder.
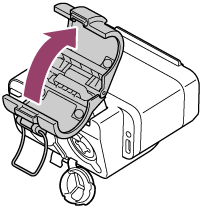
- Place the microphone on the microphone holder, close the lid to lock the holder.
Note
- When closing and locking the lid, be careful not to pinch your fingers.
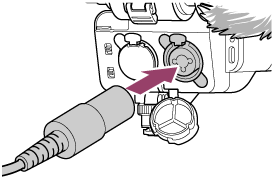
- Connect the cable from the microphone to the INPUT1 jack on this unit.
- Tuck the cable from the microphone into the cable holder on this unit.
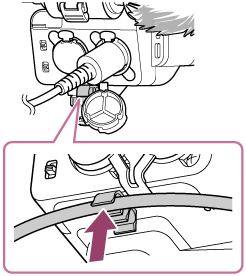
Do not pull the cable with excessive force or attach it to the cable holder while it is slack, as this may cause the microphone mounted on the microphone holder to tilt significantly.
To achieve sufficient vibration isolation effect, be sure to avoid a significant tilt of the microphone.
- Set the INPUT1 (LINE/MIC/MIC+48V) switch to “MIC+48V.”
To remove the microphone
-
Set the INPUT1 (LINE/MIC/MIC+48V) switch to the position other than “MIC+48V.”
-
Press and hold the release lever, grasp the plug of the cable from the microphone, and pull out the cable.
-
Remove the microphone from the microphone holder.