Selecting a recording scene for an individual situation
According to a particular recording situation, you can change some recording settings, including the recording mode and the sensitivity level of the built-in microphones, at once by selecting one of the recording scenes (Scene Select).
For “My Scene 1” and “My Scene 2,” you can customize their recording settings to suit your preference.
- While recording is on standby, select “Scene Select” on the OPTION menu, and then press
 .
.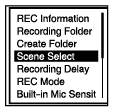
- Press
 or
or  to select a scene you want, and then press .
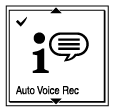
Description of menu items
You can select one of the following items:
- Scene Select Off:
- Available for the situation where no recording scene selection is required.
 Auto Voice Rec:
- Suitable for recording human voices in general (default setting).
 Meeting:
- Suitable for recording human voices in large spaces, including conference rooms.
 Lecture:
- Suitable for recording seminars and lectures.
 Voice Notes:
- Suitable for speaking into the built-in microphones to record voice notes.
 Interview:
- Suitable for recording human voices from a distance of 1 to 2 meters (40 to 80 inches), such as interviews and small meetings.
 Soft Music:
- Suitable for recording live music from a distance of 2 to 3 meters (80 to 120 inches), such as chorus or musical instrument lessons.
 Loud Music:
- Suitable for recording live loud music, such as band performances.
 My Scene 1/
 My Scene 2:
- You can customize the recording settings, including the recording mode and the sensitivity level of the built-in microphones, to make your own recording scene.
Hint
- When the microSD card is selected as the file storage destination folder for recorded file, you cannot select any recording scene with the REC Mode of “LPCM 96kHz/24bit.” Selecting such a recording scene displays a message.