


Registering a Streaming Receiver
Register streaming receivers using the Initialization Tool.
-
Select [Show Apps] on the bottom left of the PC screen and click “Initialization Tool.”

-
When you launch it for the first time, agree to the terms of the EULA (End User License Agreement).
Select your country or region from the drop-down menu at the top right.
-
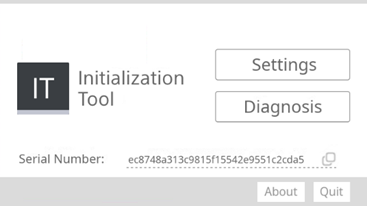
Click [Settings].
-
Enter the host name, port number, user name, and password of the connection manager, then click [Next].
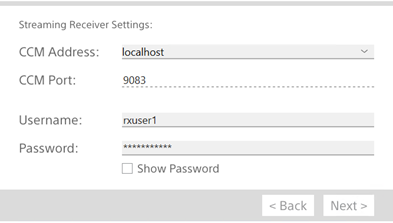
- [CCM Address]: Enter the host name of the connection manager.
Enter a host name that matches “Common Name” or “Subject Alternative Name” of the SSL/TLS certificate. - [CCM Port]: The port number of the connection manager is set to “9083” by default.
- [Username], [Password]: Enter a user name for signing in to the connection manager from a streaming receiver.
Enter the user name and password registered in [Credential] > [Receiver] on the Settings screen.
- [CCM Address]: Enter the host name of the connection manager.
-
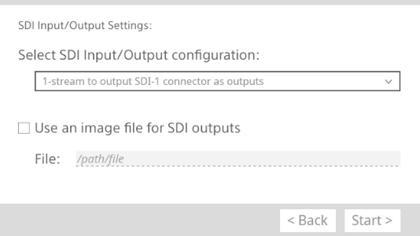
Check the SDI output settings and click [Next].
-
[Select SDI Input/Output configuration]: Displays SDI output information.
- For an SDI board with 4 ports: Displays [Use both SDI 1/2 connectors and SDI 3/4 connectors as outputs]. This outputs two received streaming inputs from separate pairs of SDI connectors (SDI 1/2 and SDI 3/4).
- For an SDI board with 2 ports: Displays [1-stream to output SDI-1 connector as outputs]. This outputs one received streaming input from SDI 1.
- [Use an image file for SDI outputs]: Place a check mark here to output a still image to the SDI connectors while streaming is stopped. When selected, specify the image file to be output.
-
-
Click [Start].
Connection to the connection manager is established and the streaming receiver is registered.
When the configuration completion screen appears, click [Quit].
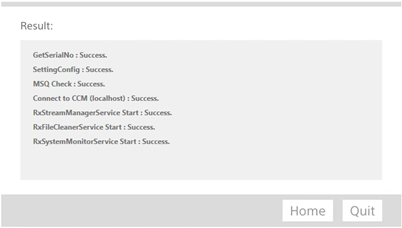
To initialize a streaming receiver
Launch the Initialization Tool, select [Diagnosis] and click [Reset].
TP1002494895