


Rear side
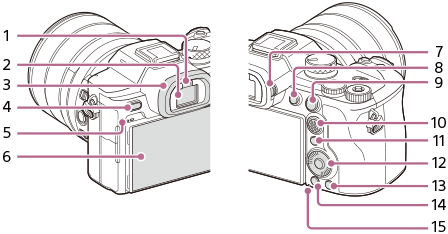
- Eye sensor
- Viewfinder
- Eyepiece Cup
- MENU button
- Speaker
- Monitor (For touch operation: Touch panel/Touch pad)
You can adjust the monitor to an easily viewable angle and shoot from any position. For details, see “Adjusting the monitor angle.”
- You may not be able to adjust the monitor angle depending on the type of a tripod you use. In such a case, release the tripod screw once to adjust the monitor angle.
- Do not apply excessive force when opening, closing, or rotating the monitor. Doing so may cause a malfunction.
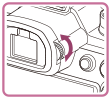
- Diopter-adjustment dial
Adjust the diopter-adjustment dial according to your eyesight until the display appears clearly in the viewfinder.
- MOVIE (Movie) button
- For shooting: AF-ON (AF On) button
For viewing: (Enlarge) button
 - Multi-selector
- Fn (Function) button
- Control wheel
- For shooting: C3 button (Custom button 3)
For viewing: (Delete) button
 -
 (Playback) button
 - Access lamp
Adjusting the monitor angle
- When holding the camera in the high or low position, pull the monitor toward you to adjust the angle.
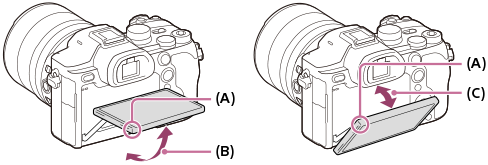
(A): Where to place your fingers
(B): Approx. 78° from the rear surface of the camera
(C): Approx. 48° from the rear surface of the camera
TP1002213217