Locating parts and controls
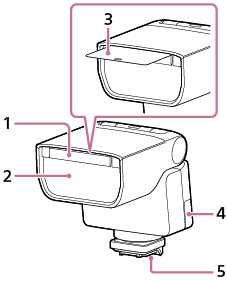
Flash unit (front side)
-
Built-in wide panel
-
Flashlamp
-
Bounce sheet
-
Micro USB terminal
-
Multi Interface foot
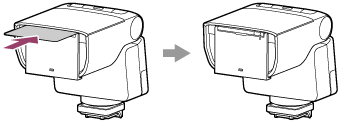
About the built-in wide panel
When you need a wider flash coverage for the focal length of 50 mm for photography, use the built-in wide panel.
To use the built-in wide panel, gently pull out the wide panel along with the bounce sheet from the front of this flash unit and fold down the wide panel to cover the flashlamp.

Push the bounce sheet back into the flash unit.
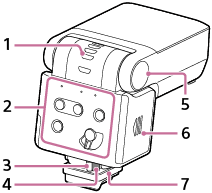
Flash unit (back side)
-
Bounce indicator (upper/lower angle)
-
Operation console
-
Lock lever
-
Release button
-
Bounce lock release button
-
Battery chamber door
-
Dust and moisture resistant cover
Operation console

-
CMD lamp
-
LEVEL lamp
-
LEVEL -/+ button
-
TEST button
-
LINK lamp
-
PAIRING button
-
Power switch
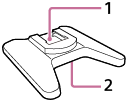
Mini-stand
-
Shoe for the Multi Interface foot
-
Tripod attachment hole