Deleting a CA Certificate Installed to Your Computer
Follow the procedure below to delete the CA certificate installed to your computer.
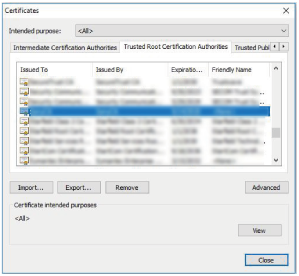
- On Internet Explorer, select [Internet Options] from the [Tools] menu, select the [Contents] tab and [Certificate], then display the [Certificate] dialog.
Example of the screen when the OS is set to English

- Select the certificate you wish to delete.
Normally, CA certificates are saved under [Trusted Root Certificate Authorities].
- Click [Remove].
The [Delete certificate?] confirmation dialog will appear.
- Click [Yes].
The certificate will be deleted.
Depending on the certificate type, this procedure may not be able to delete it. In this case, follow the procedure below, confirm the certificate installation status, then delete it.
Note
- Performing the following procedure requires that you log in as a user with administrator privileges.
- Open [Run] from the Windows menu, enter [mmc], then click [OK].
- On the “Console 1” screen, select [Add/Remove Snap-in] from the [File] menu.
The [Add/Remove Snap-in] dialog will appear. - Select [Certificate] from the list and click [Add].
[Certificates snap-in] will be displayed. - Select [Computer Account] as the certificate being managed for this snap-in and click [Next].
- Select [Local Computer] as the computer being managed for this snap-in and click [Finish].
The item managing the [Certificate] will be displayed in the console root window. Confirm the certificate in question and delete it.

