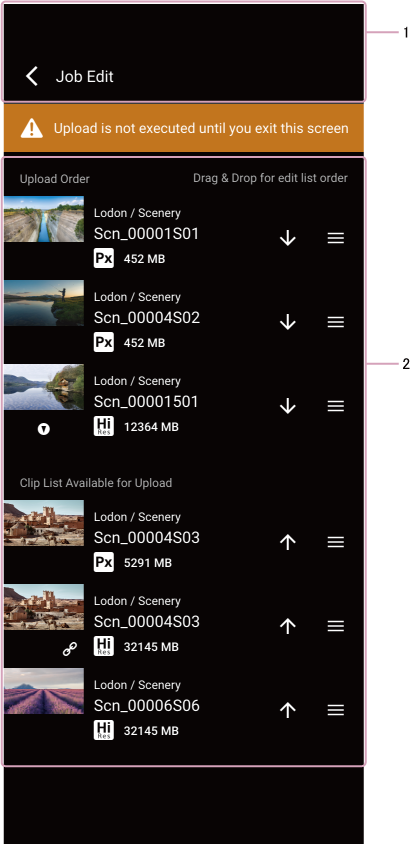
Structure of the [Edit Job List] Screen
Tap [Edit Job List] on the clip list screen to display the [Edit Job List] screen.
You can select whether to upload each clip and change the priority of each clip on the [Edit Job List] screen.
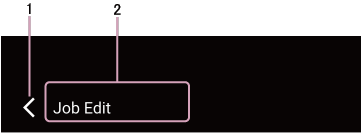
1. Header area
-
 (Return)
Returns to the clip list screen. -
Screen name display
Displays the name of the screen. “Edit Job List” screen (fixed).
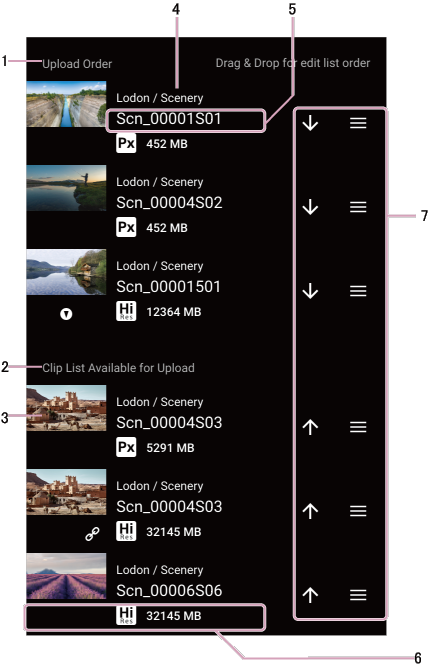
2. Upload priority control area
-
[Upload Order] list
Displays the clips that are waiting to be uploaded. Uploading takes place starting from the top of the list. -
[Imported Clips] list
Displays the clips that can be uploaded from this app. The following clips are not displayed.- Clips during chunk transfer (C3 Portal connections).
- Clips with required metadata unedited (Ci Media Cloud connections)
- Auto deleted clips
- Clips received from the camera after switching to the [Edit Job List] screen
-
Thumbnail view
Displays clip thumbnails. -
Group/story metadata display
Displays the group and story metadata assigned to the clip. -
Clip name
Displays the name of the clip. -
Information view
Displays clip information and file size.-
 (High-Res): Indicates that the clip is a high-resolution file.
 -
 (Proxy): Indicates that the clip is a proxy file.
 -
 (Essence mark): Indicates the presence of essence marks in a clip.
 -
 (Link): Indicates that the high-resolution file and proxy file are linked. Displayed only for high-resolution files.
 -
 (Chunk file): Indicates that the clip is a chunk file. Displayed only for C3 Portal connections.
-
-
Job function buttons
Use to queue/cancel clips for upload and change the upload priority.
TP1001126380