Switching shooting modes
Switch the shooting mode by pressing the UP button or DOWN button on the Live-View display of the remote control during single connection.
- Some shooting modes cannot be set depending on the connected camera. Refer to the instruction manual of the connected camera.
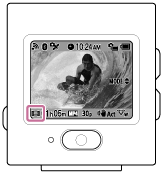
- The shooting mode icon is displayed on the bottom left area of the display.
The switchable shooting modes are as follows.
 Movie mode: Shoots movies.
 Photo mode: Shoots still images.
 Time-lapse capture mode: Keeps shooting still images at regular intervals.
 Loop recording mode: Keeps recording movies according to the set time.
Hint
- You can also switch the shooting mode via MENU items on the remote control. The procedure for switching via MENU items is described below.
- Press the MENU button to select
 (shooting mode) in the setting items. Press the UP button or DOWN button to select the shooting mode, then press the REC/ENTER button.
- Press the MENU button to select
- If you connect to the zoom function compatible camera while the Zoom setting of the camera is ON, press the UP button or DOWN button to operate camera zoom in the Live-View display.
- If you connect to a Lens-style Camera (QX series), press the UP button or DOWN button to operate the camera zoom in the Live-View display.