


Rolling shutter reduction
This feature allows you to reduce rolling shutter distortion in clips that include rolling shutter correction metadata.
Rolling shutter distortion refers to the phenomenon where unique distortions occur in captured images when photographing or filming moving subjects.
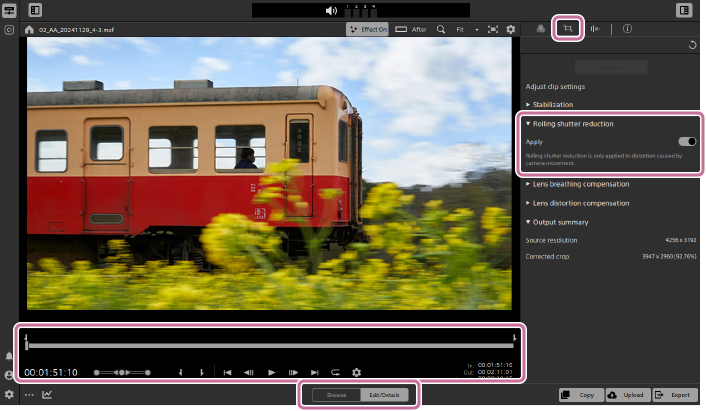
- Select a clip in the thumbnail/list panel and set the mode selector to [Edit/Details].
- Clips that include correction metadata will display the following button in the thumbnail/list panel.
 : [CONTAINS METADATA FOR] button
If clicking the [CONTAINS METADATA FOR] button displays the following icon, the clip includes rolling shutter correction metadata.
 : [Rolling shutter reduction] icon
Note
- Clips that do not contain correction metadata cannot be corrected.
- Clips that include correction metadata will display the following button in the thumbnail/list panel.
-
Click the [CLIP ADJUSTMENTS] button in the upper right of the screen.
 : [CLIP ADJUSTMENTS] button
The [Adjust clip settings] panel will be displayed.
- When opening a clip that contains correction metadata, you will first be prompted to analyze the clip. Click the following button at the top of the panel.
 : [Analyze] button
- When opening a clip that contains correction metadata, you will first be prompted to analyze the clip. Click the following button at the top of the panel.
-
Specify the range to apply correction by setting mark-in and mark-out points on the trackbar.
- Refer to the following page for details on using the trackbar.
Preview screen operations
- Refer to the following page for details on using the trackbar.
-
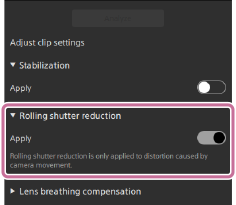
Click [Rolling shutter reduction].
The switch for applying correction will be displayed.
-
Turn on the [Apply] switch.
-
Click the following button at the top of the panel.: [Analyze] button
- If you have already performed analysis, the [Analyze] button may not be displayed.
- Check the preview screen after applying the correction.
Note
- Depending on your operating environment, the image after correction may appear as a black screen.
-
Click the following button in the lower right of the screen to open the dialog, and then adjust the transcoding settings.
 : [Export] button
Note
- Refer to the following page for details on transcoding.
Transcoding clips
- Refer to the following page for details on transcoding.
-
Click [Export].
The results of the clip adjustments will be rendered to the specified clip.
TP1002508900