


Lens distortion compensation
This feature allows you to correct distortion caused by the lens for clips shot in the X-OCN format that contain lens distortion correction metadata.
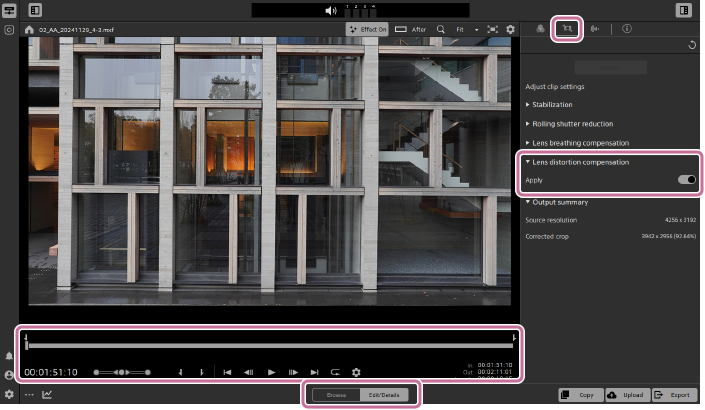
- Select a clip in the thumbnail/list panel and set the mode selector to [Edit/Details].
- Clips that include correction metadata will display the following button in the thumbnail/list panel.
 : [CONTAINS METADATA FOR] button
 - If clicking the [CONTAINS METADATA FOR] button displays the following icon, the clip includes lens distortion correction metadata.
 : [Lens distortion compensation] icon
 - The lens distortion compensation icon is not displayed on clips in the following volumes or devices.
- FTP device
- Volume of the CIFS-mediated XDCAM Station
- XDCAM deck
- XDCAM drive unit
- Optical Disc Archive volume
Note
- Clips that do not contain correction metadata cannot be corrected.
- Clips that include correction metadata will display the following button in the thumbnail/list panel.
-
Click the [CLIP ADJUSTMENTS] button in the upper right of the screen.
 : [CLIP ADJUSTMENTS] button
The [Adjust clip settings] panel will be displayed.
- When opening a clip that contains correction metadata, you will first be prompted to analyze the clip. Click the following button at the top of the panel.
 : [Analyze] button
- When opening a clip that contains correction metadata, you will first be prompted to analyze the clip. Click the following button at the top of the panel.
-
Specify the range to apply correction by setting mark-in and mark-out points on the trackbar.
- Refer to the following page for details on using the trackbar.
Preview screen operations
- Refer to the following page for details on using the trackbar.
-
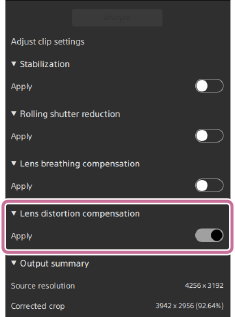
Click [Lens distortion compensation].
The switch for applying correction will be displayed.
- To turn [Lens distortion compensation] on or off, you must turn off other corrections first.
-
Turn on the [Apply] switch.
-
Click the following button at the top of the panel.: [Analyze] button
- If you have already performed analysis, the [Analyze] button may not be displayed.
Note
- Depending on your operating environment, the image after correction may appear as a black screen.
-
Click the following button in the lower right of the screen to open the dialog, and then adjust the transcoding settings.
 : [Export] button
Note
- Refer to the following page for details on transcoding.
Transcoding clips
- Refer to the following page for details on transcoding.
-
Click [Export].
The results of the clip adjustments will be rendered to the specified clip.
TP1002508902