Rear side
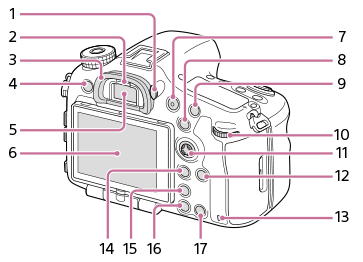
- Diopter-adjustment dial
- Adjust the diopter-adjustment dial according to your eyesight until the display appears clearly in the viewfinder. If it is hard to operate the diopter-adjustment dial, remove the eyepiece cup before operating the dial.
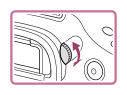
- Adjust the diopter-adjustment dial according to your eyesight until the display appears clearly in the viewfinder. If it is hard to operate the diopter-adjustment dial, remove the eyepiece cup before operating the dial.
- Eye sensor
- Eyepiece cup
To remove the eyepiece cup
Grasp the eyepiece cup on the left and right sides and lift it up.
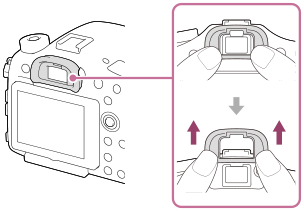
- Remove the eyepiece cup when you attach an accessory (sold separately) to the Multi Interface Shoe.
- Remove the eyepiece cup when attaching an angle viewfinder (sold separately). Also, select MENU →
 (Camera Settings2) → [FINDER/MONITOR] → [Manual], and then switch the viewfinder display and the monitor display by pressing the FINDER/MONITOR button.
- MENU button
- Viewfinder*
- Monitor
- You can adjust the monitor to an easily viewable angle and shoot from any position.
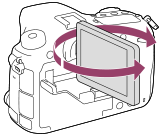
- You can adjust the monitor to an easily viewable angle and shoot from any position.
- MOVIE (Movie) button
- For shooting: AEL button/SLOW SYNC button
For viewing: (Image index) button
- When shooting with a flash, shoot images while pressing and holding the SLOW SYNC button to brightly capture not only the subject but also the background.
- For shooting: AF/MF button
For viewing: (Enlarge) button
 - Rear dial
- You can quickly adjust the settings for each shooting mode.
- Multi-selector/Center button
- DISP (Display) button
- Access lamp
- For shooting: Fn (Function) button
For viewing: (Send to Smartphone) button
- You can display the screen for [Send to Smartphone] by pressing this button.
- When you attach a vertical grip (sold separately), pressing the
 (Image rotation) button on the vertical grip displays the [Send to Smartphone] screen.
-
 (Smart Telecon.) button
- Smart Teleconverter magnifies and trims the center of the image, then records it.
 (Playback) button
- For shooting: C1 button (Custom button 1)
For viewing: (Delete) button
*Do not directly touch these parts.