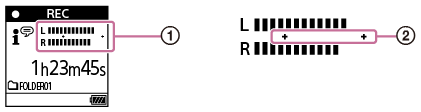
About the recording level guide
During recording, the recording level guide ( ) appears.
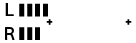
The space between the pluses (+) ( ) indicates the appropriate range for the recording level.
Adjust the orientation of the built-in microphones or the distance from the sound source, or stop recording and change the settings for Built-in Mic Sensitivity or Scene Select, so that the recording level falls within the pluses (+) while recording, as illustrated below.
For instructions on selecting the built-in microphones’ sensitivity level, see Selecting the sensitivity level of the built-in microphones (Built-In Mic Sensitivity).
For instructions on doing the Scene Select settings, see Selecting a recording scene for an individual situation.
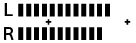
Recording level is too low (sounds quiet)
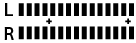
Appropriate recording level
Recording level is too high (sound is distorted)
Hint
-
Set Scene Select to [Auto Voice Rec] (default setting) to record at an optimal sensitivity while reducing stationary background noise.
This reduces recording mistakes, such as mistakes with the mic sensitivity settings and not being able to hear well during playback.
-
When the recording level is low (only a small part of the recording level guide appears between the pluses (+)), it is recommended you move your IC recorder closer to the sound source or increase the microphone sensitivity level.
The contents of the Help Guide may be subject to change without notice due to updates to the product's specifications.