


Connecting the microphone to the receiver
Pair the microphone and the receiver to connect them.
When using ECM-W5, this operation is not required because the two supplied microphones are already paired with the receiver. When adding and using a microphone, follow the steps below to pair it with the receiver.
- Press and hold the ON/OFF (Power) button on the microphone for 5 seconds.
The LINK lamp on the microphone flashes quickly in blue, and the microphone enters pairing mode.
- Operate the receiver to display the control menu screen, and then select [RX] - [PAIRING].
The [PAIRING] screen is displayed.
You can also display the [PAIRING] screen by pressing and holding the ON/OFF (Power) button on the receiver for 5 seconds.
- Select [TX] on the [PAIRING] screen of the receiver.
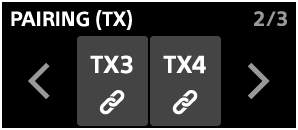
The [PAIRING (TX)] screen is displayed.
- Select a microphone to pair.
A message indicating that the microphone is being detected is displayed.
Once pairing and connection are complete,
 (Pairing) below the microphone name is displayed in orange.
To additionally pair the third and fourth microphones with the receiver, select [TX3] for the third microphone and [TX4] for the fourth microphone.
Hint
-
Select a microphone that has been paired in step 4 and select [DELETE] to delete the pairing information for the selected microphone.
To delete the pairing information for all microphones paired with the receiver, select [ALL DELETE] on the [PAIRING (TX)] screen.
-
You may hear a brief noise when the microphone and receiver are connected, but this is not a malfunction. It is recommended that you connect the microphone and receiver in advance before starting recording.