Preparation Step 5: Injecting the odorant into the sub-cartridge
Advance preparation
Please do the following before starting the odorant injection work.
- Set the torque wrench to 3.5 N·m. For details on how to use the torque wrench, please check the instruction manual for the torque wrench you are using. Opening and closing the sub-cartridge with a torque that is not set to 3.5 N·m may damage the cartridge clamper and sub-cartridge or cause the odorant to leak.
- Set the dispensing volume of the dispensing burette to a maximum of 0.66 mL. For details on how to use the dispensing burette, please check the instruction manual for the dispensing burette you are using.
- Please make preparations suited to the odorant you are using such as wearing protective glasses, protective gloves, etc.
Follow the steps below to carry out the series of odorant injection tasks. If the work is not performed correctly, the odorant may leak, adhere to the unit, and leave an odor.
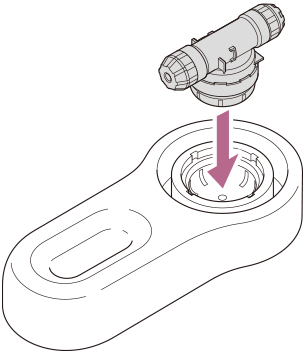
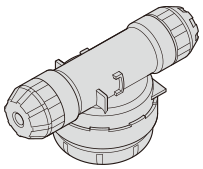
- Set the sub-cartridge removed from the cartridge in the cartridge clamper (bottom).
Check that the sub-cartridge does not move once set.
- Set the cartridge clamper (top) over the cartridge clamper (bottom).
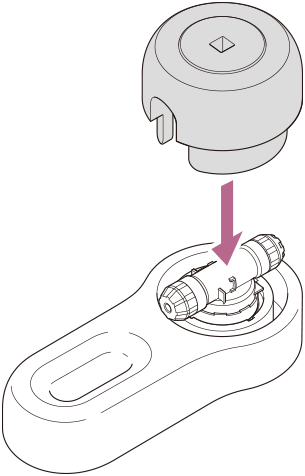
- Use the torque wrench to turn the cartridge clamper (top) counterclockwise and loosen the sub-cartridge (top).
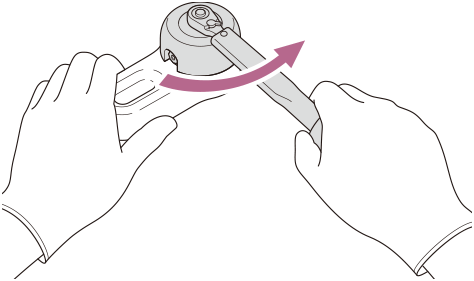
- Remove the cartridge clamper (top) and take out the sub-cartridge.
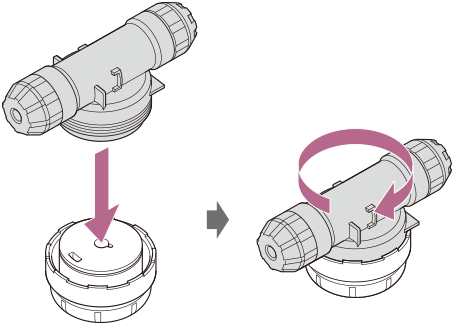
- Manually turn the sub-cartridge (top) counterclockwise to remove it and place the sub-cartridge (bottom) on the table with the top side of the metal cap (a) facing up.
-
Have the odorant and dispensing burette ready at hand.
Use the appropriate dispensing burette according to the volume and odorant to be injected.
Here, the steps are explained using a micropipette for injection.
-
Attach the tip to the micropipette.
-
Aspirate a maximum of 0.66 mL of the odorant with the micropipette.
-
Inject the odorant from the hole in the center of the top side of the metal cap.
-
Place the sub-cartridge (bottom) on a flat surface and manually turn the sub-cartridge (top) clockwise to temporarily tighten it while keeping it level.
-
Keep the sub-cartridge level and set it in the cartridge clamper (bottom).
Check that the sub-cartridge does not move once set.
-
Set the cartridge clamper (top) over the cartridge clamper (bottom).
-
Use the torque wrench set to 3.5 N·m to turn the cartridge clamper (top) clockwise until it clicks and tighten the sub-cartridge (top).
When you hear it click, the sub-cartridge is hermetically sealed. (The sound indicating that it is sealed may differ depending on the torque wrench used.)

-
Remove the sub-cartridge from the cartridge clamper and wait approximately 30 minutes.
It takes approximately 30 minutes for the odorant to permeate inside the metal cap. Do not move the sub-cartridge while you wait.
Place in a level position for approximately 30 minutes.
-
Repeat steps 1 through 13 while waiting to inject the odorants into the remaining sub-cartridges.
Note
- Up to 0.66 mL of odorant can be injected. If more than 0.66 mL is injected, the odorant may leak and cause the unit to smell or malfunction.
- In the event that the odorant leaks, wear protective gloves and wipe it off appropriately with a cloth, etc. according to the odorant.
- Tightening the sub-cartridge with a torque that is not set to 3.5 N·m may damage the cartridge clamper and sub-cartridge or cause the odorant to leak.
- If the specified torque is not reached while tightening with the torque wrench, the cartridge clamper may be defective. To replace the cartridge clamper, please contact the dealer where the unit was purchased.
- A sub-cartridge can only be used once. Do not reuse a sub-cartridge that was injected with an odorant one time.
- Do not open a sealed sub-cartridge that was injected with an odorant and sealed. Doing so may cause the odorant to leak.