Using a computer to connect the speaker to Wi-Fi
If you are connecting your speaker to Wi-Fi using this method, you must initialize the speaker. Be aware that initializing the speaker returns all of the settings to their defaults and deletes all of the BLUETOOTH pairing information. To connect using the BLUETOOTH wireless technology again, first delete the speaker's pairing information on your PC, and then pair with the speaker again.
This section explains how to use your computer to connect your speaker to Wi-Fi.
Check the following before starting any operations:
-
The speaker is as close to a Wi-Fi router as possible.
-
Both an SSID (wireless network’s name) and an encryption key (WEP or WPA) are required to do Wi-Fi settings. An encryption key (or a network key) is a cipher for restricting the devices that can communicate with each other. These are used to carry out more secure communication between devices that are connected to Wi-Fi routers or access points.
- Write down the SSID and password (encryption key) for the Wi-Fi router you are using.
For details, refer to the operating instructions for the Wi-Fi router you are using.
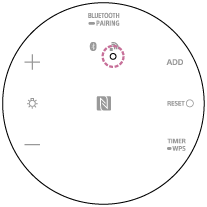
- While the speaker is on, press and hold both the speaker’s
 (volume) button and
  (on/standby) button at the same time for at least 4 seconds.
If the operation is successful, the
(on/standby) indicator flashes in white and initialization begins.Initialization requires tens of seconds.
After that, when initialization is complete, the
(on/standby) indicator turns off and the speaker restarts.Initializing the settings deletes all BLUETOOTH pairing information and network settings.
- Connect the speaker to the PC.
For Windows 8.1
-
Click or tap the desktop on the Start screen.
-
Select the
 or
or  icon on the bottom right of the screen.
-
Select [LSPX-S2_xxxxxx] from the list of wireless networks that you can browse from the computer.
For Windows 10
-
Select the
 or
or  icon on the bottom right of the screen.
-
Select, in order, [LSPX-S2_xxxxxx] - [Connect] from the list of wireless networks that you can browse from the computer.
For Mac:
-
Select the
 icon at the top of the screen.
 -
Select [Open Network Preferences...].
-
Select [LSPX-S2_xxxxxx] from the list of wireless networks that you can browse from the computer.
-
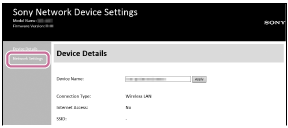
- Display the [Sony Network Device Settings] screen.
-
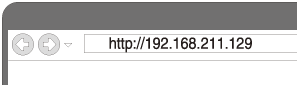
Launch a browser (Internet Explorer, Safari, etc.).
-
Enter the following URL in the address bar.
-
- Select [Network Settings] from the menu.
- Enter the Wi-Fi router’s SSID and password (encryption key).
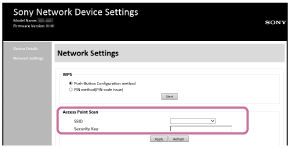
- Select [Apply].

- Check that the network indicator lights up white.
If the network indicator lights up white, then the speaker is connected to Wi-Fi.
It may take more than 1 minute for the network indicator to light up.
Connection is completed.
- Connect your computer to the Wi-Fi router you are using.
Hint
-
If you want to set a fixed IP address, set the IP address in the screen in step
 above.
 -
Once the speaker is connected to Wi-Fi, either restore your computer to its original connection or connect your computer to the Wi-Fi router you are using.
Note
-
This procedure needs to be completed within 30 minutes. If you cannot complete the procedure within 30 minutes, start over from step
 .
. -
Your connection is not secure until you finish the Wi-Fi settings. Your Wi-Fi connection becomes secure again after you finish the Wi-Fi settings, and then do the settings for Wi-Fi security.
-
If you are connecting the speaker to Wi-Fi for the first time after purchase, the BLUETOOTH/Network Standby function automatically turns on.